Using External Power and USB
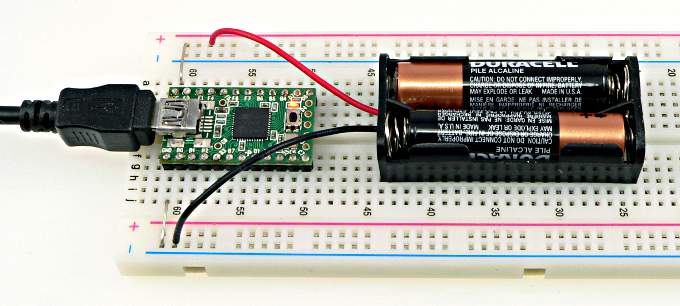
Teensy can operate from power applied to it's Vcc (or +5V) pin and Ground. But to use USB with external power, the power provided by the USB cable should be separated from the external power.

Caution: Reverse polarity power or greater than 6 volts can damage Teensy.
Recommended Operating Parameters
| Voltage Range | Maximum Clock | USB Operation |
|---|---|---|
| 4.5V to 5.5V | 16 MHz | Yes |
| 3.4V to 4.5V | 8 MHz | Yes |
| 3.0V to 3.4V | 8 MHz | No* |
| 2.7V to 3.0V | 8 MHz | No |
| 2.6V** to 2.7V | 2 MHz | No |
* USB can operate with 3.0 volts if UCAP is connected directly to power, by shorting the "3V" pads. Please refer to the schematic. However, UCAP must not be driven above 3.6 volts! Never short the 3V pads if the power supply can go over 3.6 volts.
** Teensy 2.0 can operate down to 2.4 volts. Teensy++ 2.0 is limited to 2.6 volts.
These are "worst case" recommendations from Atmel's datasheet. Often Teensy and Teensy++ can operate at 16 MHz down to lower voltages, and the USB often functions at lower voltages, at least at room temperature (the Teensy shown in these photos worked on two AA cells, but 3 would be more reliable). For important applications, these recommended ranges should be followed to assure reliable operation.
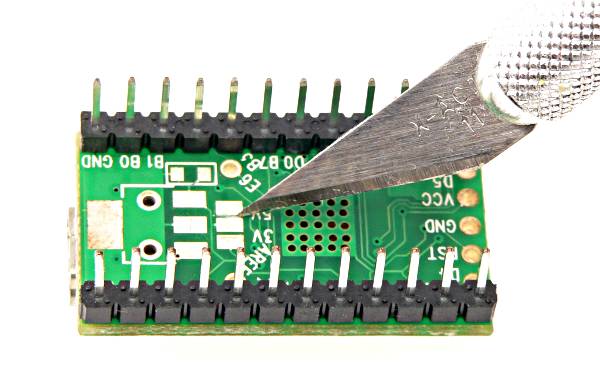
Option #1: Cut "5V" Pads Apart
Cutting the trace that connects the "5V" pads will isolate the USB power from the rest of the circuit board. Please refer to the schematic for details. If the original connection needs to be restored, the pads can be soldered together.

Option #2: Cut the Red Wire
Another option is to cut the red wire within your USB cable. Caution should be used to prevent the red wire from shorting to the metal shield. The externally powered Teensy should not be used with a normal cable.

Despite the disadvantages, this approach involves cutting a cheap cable instead a more expensive Teensy or Teensy++ board. This option is the only one which can be undone without soldering. Just strip and twist the red wires back together, and be sure to properly insulate the red wire. It must not touch the metal shield.
Option #3: Two 1N5817 Diodes
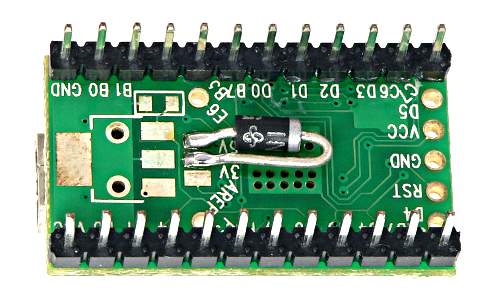
When using a battery, it may be desirable to avoid draining the battery when USB power is available. The options above always run the Teensy processor from the external power. Using 2 diodes, you can automatically switch to the higher voltage.First, a the "5V" pads must be cut apart, as in option #1 above. Then a 1N5817 diode is soldered between the pads. The cathod (side with the stripe) must face the center pad.

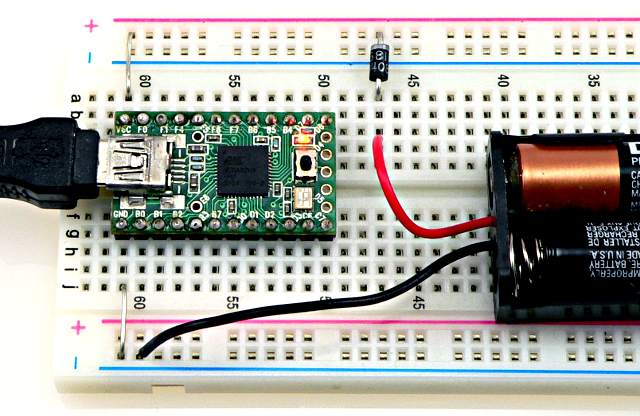
The battery also needs to be connected with a diode, where the cathode connects Teensy's Vcc (+5V) pin. The diode also protects Teensy if the battery is connected backwards.

The 1N5817 diodes will typically lose about 0.3 volts. For best run time, 3 AA batteries should be used.
Complex power switching circuitry can also be made with transistors, but the design of such complex circuitry is beyond the scope of this web page.