Making a Twin Engine RC Airplane Safe (TwinAir Project)

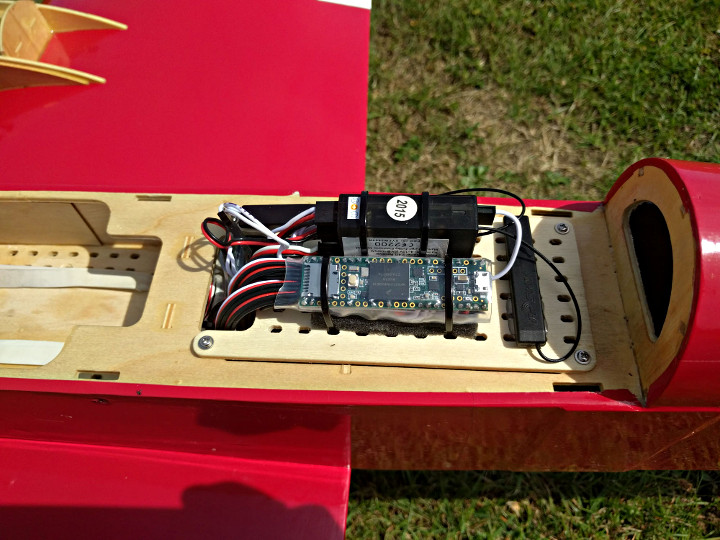
Zaite12, an RC Airplane enthusiast, added a flight system (TwinAir project) to a custom made RC air plane make it safer to fly in the case of engine failures.

Zaite12 and a friend have been flying RC model airplanes for a number of years and have watched many twin engine aircraft tragically crash – mostly due to one engine failing.  A plane can be landed safely after an engine fails, but it is no trivial task.


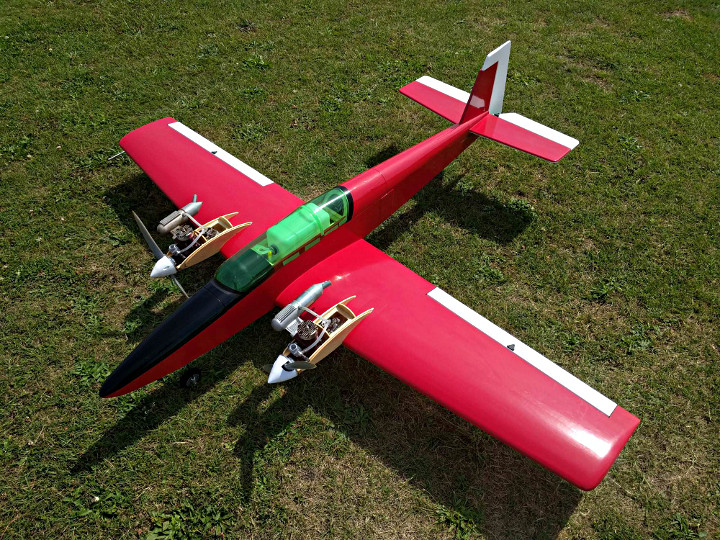
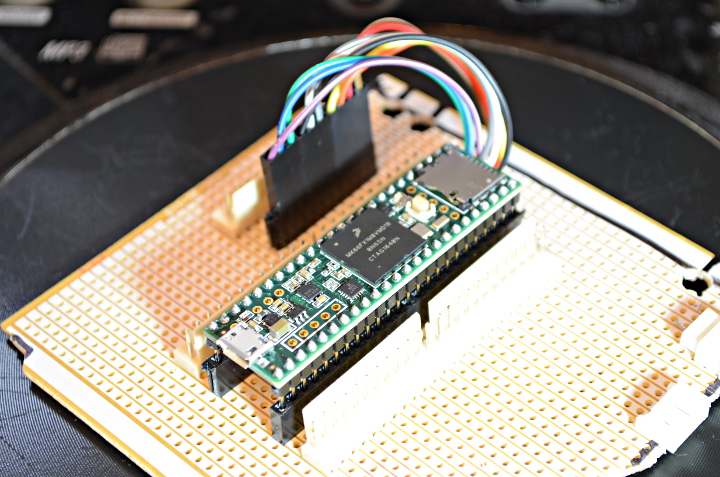
The pair had been talking about building a twin engine airplane and this got Zaite12 thinking about how to more reliably deal with the inevitable loss of an engine.  Humans are not reliable enough for this task, but a computer is.  He got to work on a system to manage a long list of tasks.  While the Teensy 3.1 he started with quickly ran out of inputs and outputs, a Teensy 3.6 had what he needed to make the project happen.

The key features included in the system are:

– PWM edges from the 8 output channels of the RC receiver have to be accurately timed
– Output/control of all servos
– Engine RPM
– Airspeed
– Ground logic through the use of a proximity sensor (possibly in future we will use squat switches)
– RPM synchro using a PID loop to make the aircraft “sing” and not “wah wah wah”
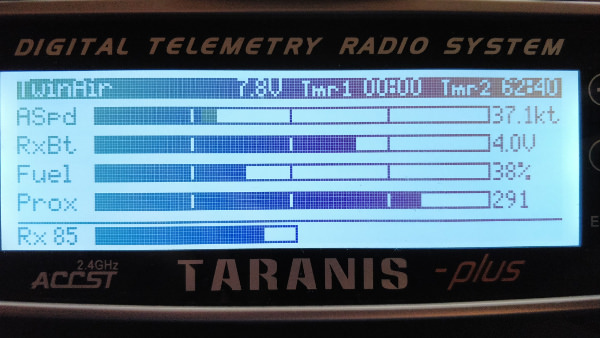
– Telemetry downlink and voice annunciations on the FrSky X9D Taranis Plus transmitter we use (e.g. “Right engine fail”)
– Execution flow is critical and must not block for any significant time, under any circumstances, even if a sensor fails or physically disconnects
– Fallback assumptions in the event that one or more sensors fail (e.g. ground proximity)
– Datalogging of all important data for subsequent analysis

Soon the initial design goals were complete and they pair could deliberately cut an engine in flight, the rudder was managed automatically by the new flight system, and the aircraft could still be flown.

Here is an example of the telemetry data displayed on the receiver

In this video their custom RC aircraft experiences a genuine engine failure and they are able to keep it flying.

Code for the project can be found in this forum post.

Ultimate Gumball Machine

Arduino “having11” Guy took a gumball machine and stepped it up a notch by adding LEDs, WiFi, and an LCD Screen – just to name a few improvements

This ultimate gumball machine features an interactive TFT display that allows users to dispense gumballs and change the LED colors.   A Teensy 3.5 provides the processing power needed to drive the display.

Code for the project can be found on the Hackster.IO project page

Files for the 3D printed parts can be found over on Thingiverse

Lightbar – Light Painting

Iamthesoundman made LightBar,  a cool light painting project.

Light painting is a technique where exposures are made by moving a hand-held light source while taking a long exposure photograph.

This project uses a Raspberry Pi running a Python script that sends the image data to a Teensy which drives the LEDs.

Code for the project can be found on LightBar project page.

Ergo60 Keyboard

Warren Janssens made his own 60 key ergonomic keyboard.

This sleek keyboard is made with minimal components for a small footprint.  It has 2 hand clusters with 25 keys each and 2 thumb clusters with 5 keys each.

The code is a fork of TMK and you can find it on GitHub.


Pioneer CDJ 800 MIDI Retrofit

Lee Smith (ada DJ Legion) took a faulty Pioneer CDJ-100 digital CD Deck and turned into a MIDI device.

Lee is a DJ on the weekends at a large club, and by day repairs Technics and Pioneer gear.  The challenge of retrofitting a dead Pioneer CD Deck was right up his alley.  He published a great 7 part video series on the process.  You can find the videos here on his You Tube channel.

Code for the project can be found on GitHub.


LED Fur Coat

Veteze was inspired at BurningMan to make an LED Vest.

The vest has 465 LEDs (shown in the first picture without the diffusing fur attached) and runs for about 4 hours on battery power.  Even with a low luminosity value, the LEDs are still pretty bright.

You can find the code for the project in this forum thread, as well as some good discussion about how the code was improved with some help of other forum participants.

MIDI to Control Voltage Converter

elkayem has made a custom MIDI to control voltage converter (in a nifty 3-D printed case) that works as an interface between a computer (or iPad) and an analog synthesizer.

It’s a multi-channel USB MIDI to CV converter based on the Teensy 2.0, the perfect interface between your computer or iPad and an analog synthesizer. It can independently drive up to three oscillators with 1V/octave CV inputs.

This device has the following features:

  • Three channel Note CV output (88 keys, 1V/octave, MIDI channels 1-3) using a 12-bit DAC
  • Configurable note priority for each channel (Top Note, Bottom Note, or Last Note Priority)
  • 5V Gate/Trigger outputs, where each channel can be independently configured to either output a gate (output high for entire length of time that note is on) or trigger (20 msec pulse each time a new note is initiated)
  • Velocity CV output (0 to 4V) for each channel
  • Pitch Bend CV output (0.5 +/- 0.5V), which can be configured for channel 1, 2, or 3
  • Control Change CV output (0 to 4V), which can be configured for channel 1, 2, or 3
  • OLED user interface, used for setting parameters and saving to EEPROM

Project files as well as detailed project build information can be found on this GitHub page.