Blog Posts

Linear CCD Suite

DrM is a prolific creator of charge-coupled device (CCD) digital imaging projects, and the latest is a full-featured linear CCD suite with an $80 BOM cost that provides capabilities comparable to commercial instruments that might cost thousands of dollars.

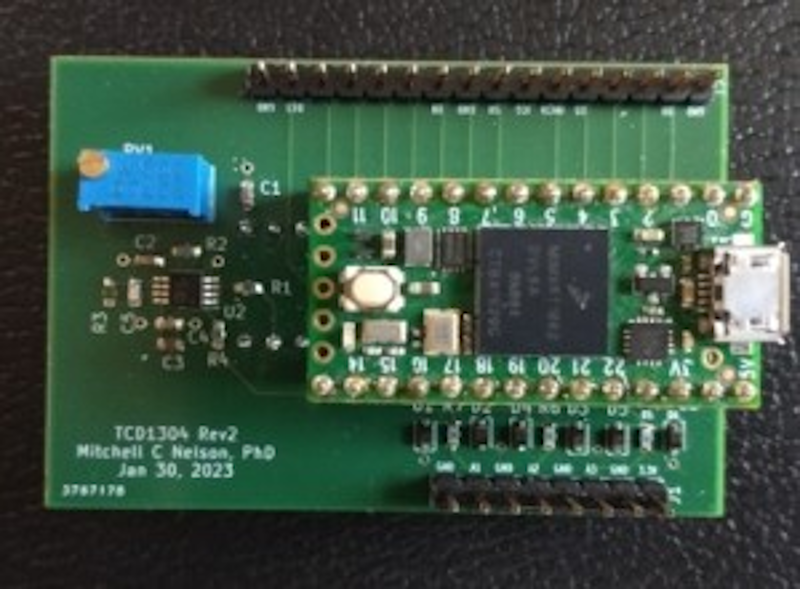
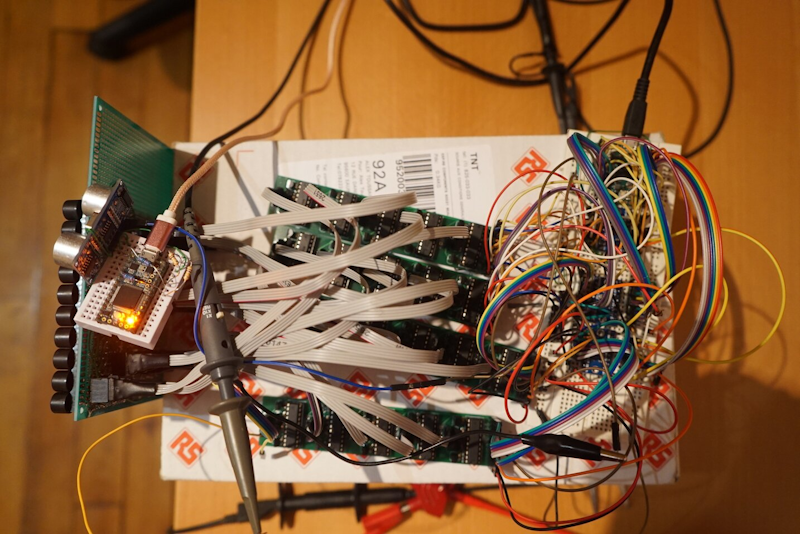
On the hardware side, the Teensy 4.0’s 12-bit ADC is paired with the Toshiba TCD1304 linear image sensor, with a full-featured firmware sketch including trigger, gate, and clocking functions.

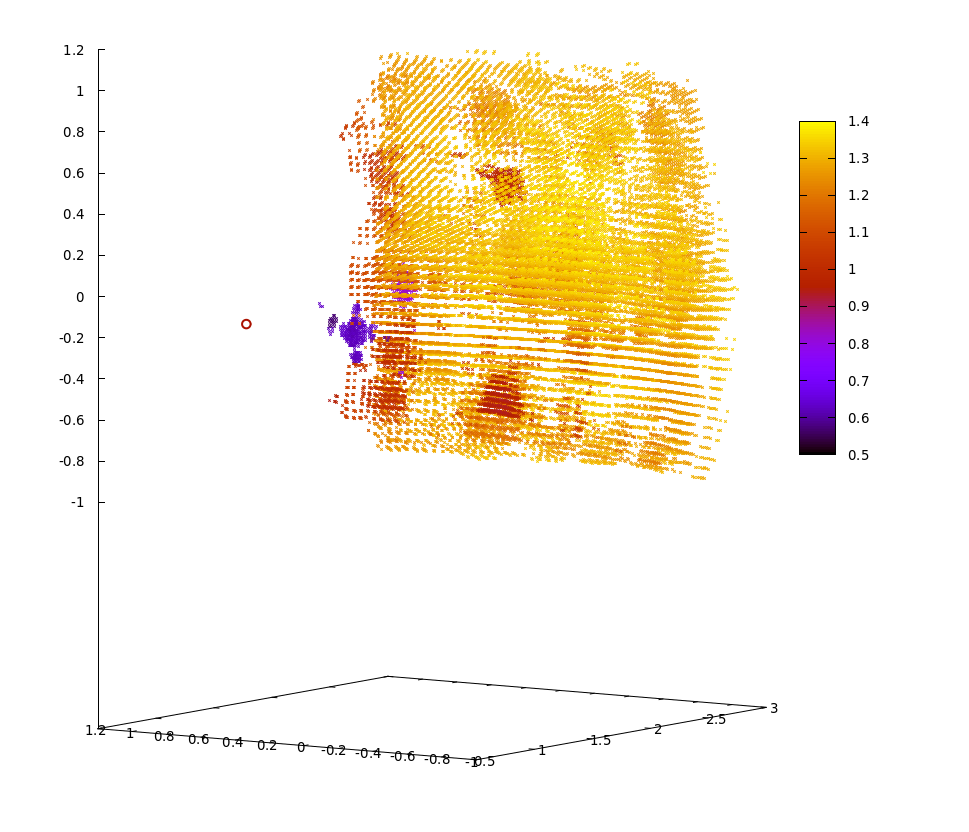
A companion Python Class library provides a command line interface for control and data collection, as well as real-time graphics. KiCad files, firmware source code, and the Python controller can all be found on GitHub, along with examples of using it as a spectrometer and for measurement of spectral-spatial-dynamics in an OLED. The output of using the sensor to record the time evolution of the spatial distribution of light produced by an OLED is displayed below.

CTR2 – Ham Radio Human-Machine Interface

Lynovation picked the Teensy 4.1 and Audio Adaptor Board as the basis for their CTR2 (“Control The Radio Too”) Human-Machine Interface for controlling up to 16 ham radios and eight antennae.

CTR2 is a standalone remote touchscreen display, with built-in DSP audio processing, FFT display, a rotary encoder for input, as well as USB audio, mouse, and keyboard support. More information can be found at lynovation.com, or in the ARRL’s September/October 2021 QEX magazine.

Conway’s Game of Life Note Generator

Expensive Notes has been using Novation Launchpad USB Ableton controllers in a novel way, connected to a Teensy 4.1 via USB Host rather than using the intended DAW.

The Launchpad becomes a large 8×8 RGB LED “screen” for the Teensy, as well as an input device, while the Teensy can interface with other devices over MIDI. And in this particular example, rather than sequencing or performing with the Launchpad, notes are controlled by Conway’s Game of Life cellular automata simulation algorithm.

The connected Korg Volca Bass and FM receive notes based on cells dying and being born respectively. The game can also be re-seeded with new cells in order to alter the pattern. MIDI clock is sent to all connected devices to keep everything in sync, including a Volca Drum. Hear the automata in action in the video below!

DIY VR Controllers

Shiny Quagsire (Max Thomas) chose an extremely ambitious project for his high school final project: rather than creating something using the many VR hardware solutions out there, he decided to create his own VR controllers from the ground up.

The eventual solution utilized a Teensy 3.2 with TDK MPU-9250 nine-axis gyro/accelerometer/compass sensors, in a PlayStation Move-like form factor, but using infrared.

The initial attempt used pure IMU data, which proved infeasible due to poor sample rates and accuracy. Switching to a camera and LEDs whose position could be triangulated improved things, but what proved superior to this was diffusing IR LEDs via styrofoam spheres and using the resultant 2d circle to determine X/Y position, and its size to approximate Z. The entire journey can be relived in detail on Shiny Quagsire’s Tumblr, and the source code and STLs can be found on GitHub.

Dalek Synth

Expensive Notes was given a broken Dalek (toy, not an actual homicidal mutant!), which, as is their wont, meant turning it into a synth! Based on a Teensy 4.1 and Audio Adaptor Board, the psychopathic cyborg is now polyrhythmic thanks to Expensive Notes’ creative mods.

The mutant’s antennae and arms have been connected to potentiometers and joysticks to adjust parameters such as sequence length. Dalek-bump buttons are enabled by Adrian Freed’s FastTouch library. Get ready to party like it’s a Kaled family reunion with Expensive Notes’ synth jam demo below!

Doom Game Emulation with VGA Output

“Will it run DOOM!?” And as emulator maker extraordinaire Jean-Marc has now proven (and to be honest you may have already inferred from this post’s title), the answer is a resounding “OH YES”!

So, how did Jean-Marc squeeze all those demons and BFGs onto a Teensy 4.1? An STM32 port of Chocolate Doom certainly helped, as well as the fact that he had already developed a VGA driver. USB keyboard support, while it does not include complete mapping, allows you to enjoy the game as it should be: with arrow keys.

Source code and so much more can be found in the M.CU.M.E (Multi CompUter Machine Emulator) GitHub repo, along with information on the many other games and platforms supported by the project.

TOPS – The Robot Dog

We’ve all seen videos of Boston Dynamics’ robot “dog” Spot dancing, but $75K is a lot to spend. Enter Aaed Musa’s Traverser of Planar Surfaces (or “TOPS” – “SPOT” backwards!) which can get just as funky at less than 1/20th of the cost!

The project, which was inspired by James Bruton’s openDogV3 robot, took four months to build, at a cost of around $3,300. It features twelve custom high-torque actuators, a 3d-printed planetary gearbox, a carbon fiber frame, a 6S 5200mAH LiPo battery, and of course, a Teensy 4.1. Code, schematics, and BOM can be found on GitHub, with more detail on Aaed’s web site and Hackaday. And most importantly, you can regard its sweet moves in the video below!

Ultrasonic 3D Scanner

Alex Toussaint created an ultrasonic 3d scanner using off-the-shelf components for under $100!

What was your fantasy when you were 15? For Alex it was an autonomous drone that could deliver cans of Coke, which he reasoned would require a 3D map of its surroundings. Ruling out LiDAR as too expensive, and Simultaneous Localization and Mapping (SLAM) algorithms as insufficient, perhaps something could be done with an ultrasonic sensor, since humans are able to pinpoint locations based on sound? The result of this theory, which Alex reached at the grand old age of 19, he achieved this 3D sensor goal.

The detailed write-up on Alex’s site explains the concept, math, and various stages of success and failure, but the end result was a 10×10 grid of emitters with a 9x directional receiver based on LM386 amplifiers.

The resultant scans, while perhaps not perfect, are frankly incredible for a device built from scratch. Source code, schematics, and visualization scripts can all be found on GitHub if you’d like to build your own!


Digital Instrument Suite

Jay Ackley has created a collection of musical devices called the NoPlay Digital Instrument Suite.

As Jay’s ambitions grew, it became clear that the simple saw wave output of the original microcontroller he was using was not going to work for his more advanced creations, which led him to dive into the world of Teensy and the Audio Adaptor Board.

The resulting Electrolute Mach 3 is a guitar-like instrument which allows the player to select a chord from one group of buttons and arpeggiate over the corresponding pentatonic scale with the other, using one of six different voices. Another device, the polyphonic Teensy LC-based Chordulator, plays first, third, fifth, and octave notes using pressure-sensitive resistors to affect the volume. Finally, the Teensy 3.5-bsed DrumTray percussion sequencer provides four 16-note tracks with adjustable swing, a 12-note 3/4 mode, and the all-important “party mode” which strobes all 64 RGB LED buttons. See them all in action in the video below!

Engine Monitor for an Experimental Aircraft

Andy Meyer pilots experimental aircraft pilot and was in need of a good engine monitor to show key metrics on a sunlight readable screen.

After struggling for years with an Arduino-based project, Andy discovered Teensy and paired it with a NewHaven 4.3 inch 800×480 serial display…and it was all blue skies from there!

The current solution is based around a Teensy 3.6 with eight Type K thermocouples plus analog pressure and temperature sensors.

Oil temperature and pressure, manifold pressure, engine timing and RPM, are all currently measured and output to a 3.5″ capacitive touch display. Fuel flow, airspeed, altitude, and other values from the plane and GPS are also incorporated, with outputs for warning lights and a dimmer. Data is also logged to the onboard mSD card.

In true maker fashion, Andy designed the boards in Upverter and fab’d them through OSH Park, and designed the housing in OnShape and printed it on his Prusa i3 MK3. The inspirational finished product (for now!) can be seen mounted in the cockpit below.

Andy’s journey to make this engine monitor and many of the challenges are explained on this forum thread.