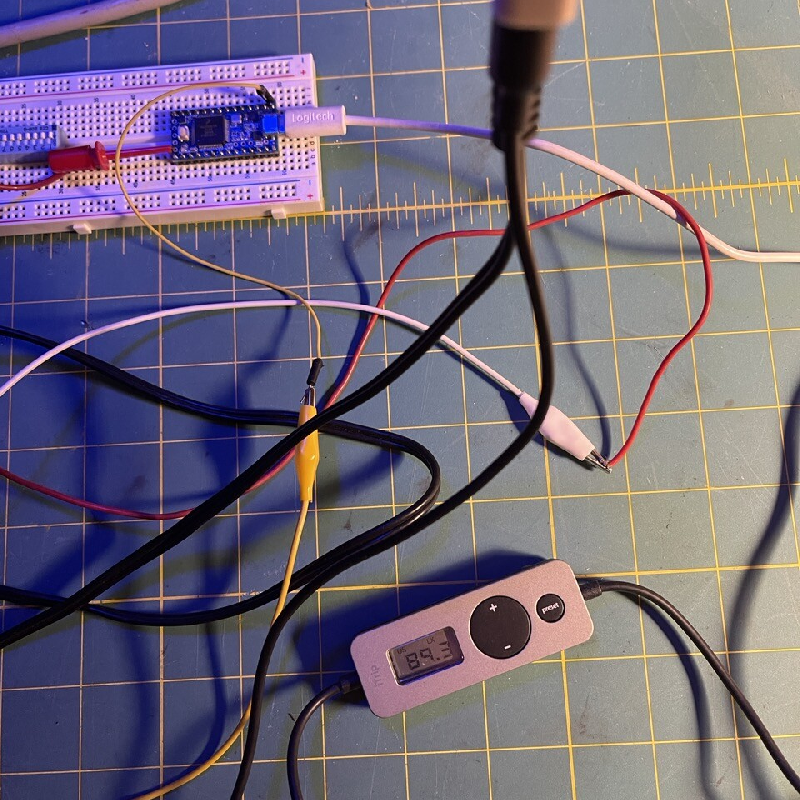
For his latest project, he ditched the retrocomputing angle and went full futurism, using a Teensy 3.1 as the basis of his Dystopian Drone.
The Teensy outputs a continuously-evolving synthesized saw wave sound, which is then broadcast worldwide at http://echo.lurk.org:999/ef1j.mp3 as well as locally on 89.3 FM via a simple external transmitter. The result is deliciously chilling, and provided the perfect sinister soundbath for the authoring of this blog post.
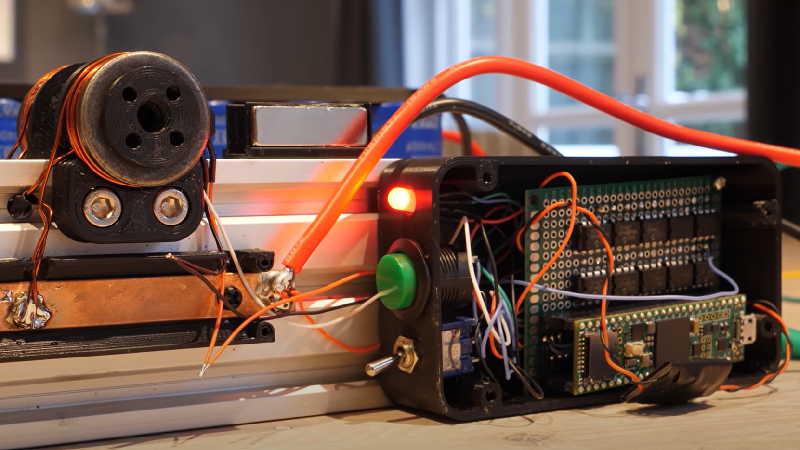
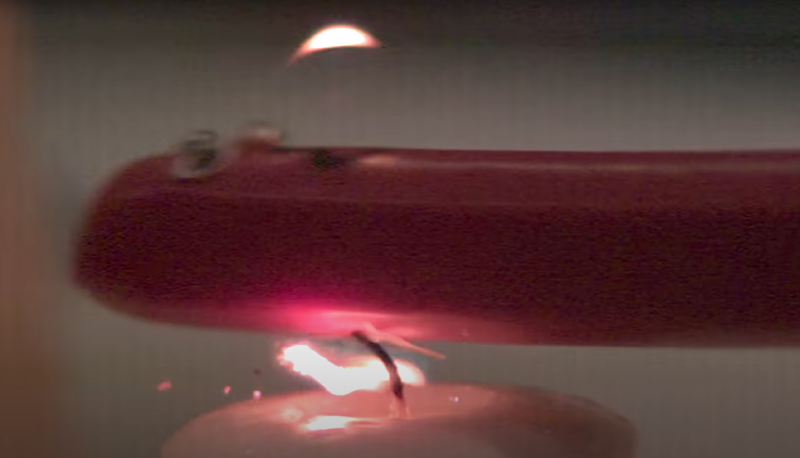
UK-based engineer and YouTuber Tom Stanton had a dream: to dress up and launch sausages at ungodly speeds. Well, maybe that wasn’t the original dream, but it’s somehow where things ended up?!
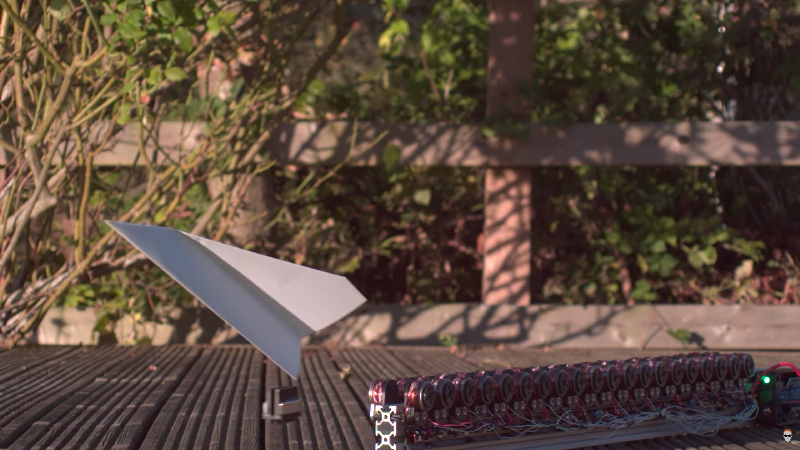
As reported on our own forums, Stanton designed and built an incredibly impressive Teensy 3.5-based Electromagnetic Rail Launcher, consisting of a linear motor (as opposed to the more typical circular examples which rotate a shaft) and a track down which magnetic material can be propelled.
Said material might be a paper airplane (via magnetic sled), or, as alluded to earlier…a sausage with googly eyes and a smile.
Watch both below, along with a second video showing a more optimized version launching a sturdier 3d-printed aircraft.
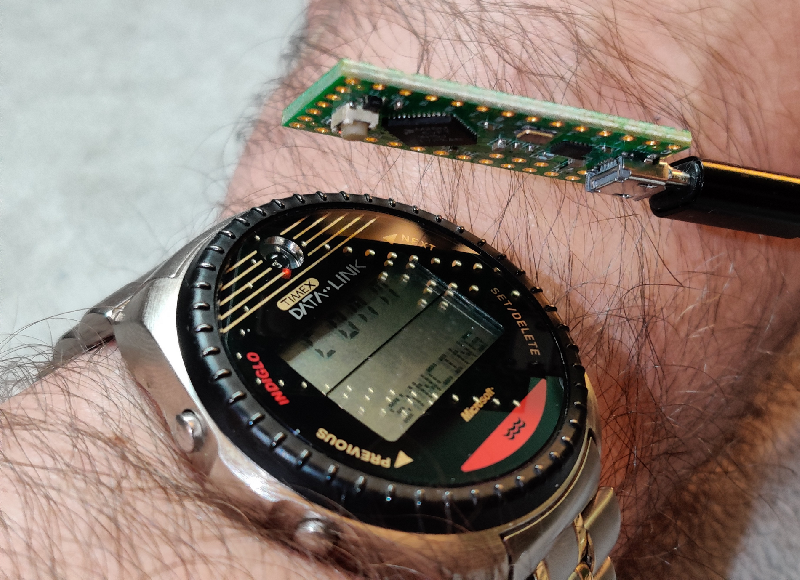
The year is 1994. Quentin Tarantino’s magnum opus, Pulp Fiction, is demolishing the silver screen, while Ace of Base dominates the pop charts with “The Sign”, “All That She Wants” and a cover of Aswad’s “Don’t Turn Around.”
And being the gadget-obsessed dork that you are, you just picked up the latest Microsoft x Timex colab: the Data Link wristwatch compute. While all the other nerds are eating up Martha on their clunky Apple Newtons and pretending that they can touch-type on their chunky Psions, you carry the world on your wrist.
Except it’s not 1994. It’s almost a full three decades later, and music is confusing and strange and nobody goes to the movie theatre anymore because there is a tripledemic and they can just binge on boring tiny slabs at home without the malodorous stench of stale popcorn. But that’s not all: the CRT displays that are required to sync with your Windows 3.1 desktop are becoming ever-rarer. So what do you do? Well, if you are Maxwell Pray AKA @synthead on GitHub, you grab a Teensy LC. The Timex sync relies on pulses of light to transmit data, so the LC’s built-in LED already gives you everything you need to emulate the original hardware. With this in hand, you can grab Maxwell’s emulation software from GitHub, and you’ll be transferring your appointments, anniversaries, phone numbers and reminders at speeds of up to 1K/minute, just like in the good old days…!
Prajwal Mahesh created this sampling synth inspired by OP-1.
Teenage Engineering make some of the most desirable, intuitive, and innovative synthesizers and other consumer devices available on our planet. But innovation costs, and the latest OP–1 field is a $2000 investment in sonic bliss. So what is the humble maker, short on cash but long on hardware hacking ability to do? For Prajwal Mahesh, the answer was to grab a Teensy 4.1 and a copy of the Teensy Audio Library to create his own sampling/synthesizing/sequencing groovebox!
Prajwal has documented the project thoroughly on his blog, made the hardware and software freely available on GitHub, and posted copious demos and build updates to YouTube. If you’re looking to create your own hardware DAW, or even just to be inspired by a journey that started with the Teensy Audio Library and has already arrived as a seriously impressive clone of the world’s premier consumer electronics designers’ magnum opus, we highly recommend studying this Teensy-based portable groovebox project.
Super Smash Bros. is a beloved franchise offering Nintendo heads the chance to see their favorite characters’ worlds collide for the noble pursuit of beating the crap out of each other.
For over two decades, fans have been “settling it in Smash” from a roster that now extends beyond Nintendo’s stable with the current Switch version’s 74 playable characters.
But for many, the pinnacle of gameplay can be found in 2001’s Super Smash Bros. Melee for the Nintendo GameCube. It comes as no surprise to find that the particular type of zealot who insists on the GCN release when it’s time to Smash has a rather particular set of tastes.
Case in point: ayegiohh‘s Teensy 4.0-powered PhobGCC motherboard (version 1.2) for Gamecube controllers. This direct replacement board reads stick position using magnets and Hall effect sensors, as opposed to the original potentiometer-based method which can degrade after heavy use at the professional level. In addition to software and hardware, extensive documentation can be found on the project’s GitHub, along with a complete guide to making, buying, or outsourcing the creation of your PhobGCC. Regardless of your favourite fighter, we think you’ll want to main this Teensy-powered marvel next time you fire up the ol’ purple lunchbox to deal out that Final Smash*.
*yes we know the Final Smash was debuted in Super Smash Bros. Brawl, nerds — it just seemed like a cool way to end this blog post, and now you’ve ruined it by making us have to add this big ugly addendum. Just kidding, we love you! <3
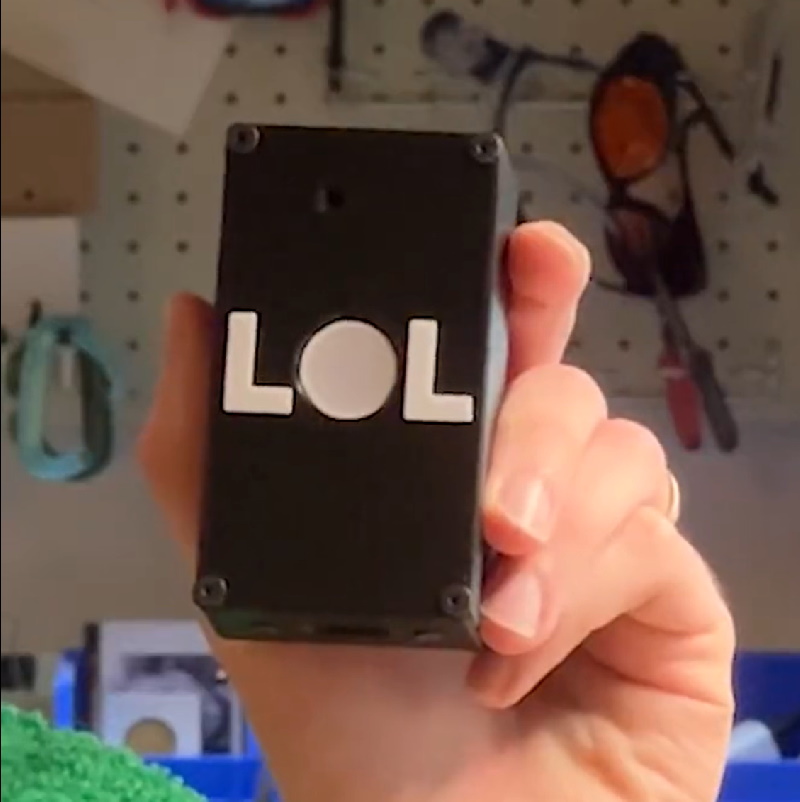
We all LOL, but do we always LOL IRL? Brian Moore’s new Teensy-powered device aims to keep would-be LOLers honest by confirming that they have literally laughed out loud before permitting them to make such a claim with their keyboard.
Trained on over 100 laughs using Edge Impulse’s machine learning platform, the Teensy 4.1-powered LOL Verifier adds a timestamp and checkmark of authenticity when a laugh is detected, or replaces any inauthentic “LOL” with a deadpan “that’s funny.” Not a great deal more is known about workings of the device, but Brian’s web site contains short overviews of this and many more of his fascinating thought experiments.
I made this thing called LOL Verifier: a device that only lets you type lol if you’ve actually laughed out loud pic.twitter.com/Gsc63yGEm0
When computers and electronics were in their most nascent phases, they were largely the realm of hackers in their garages, with glorious hand-crafted wooden panels delightfully concealing their bodged-together innards.
The same was true of early synths, with the first Moogs clad in walnut cases, and while the tradition has perhaps somewhat lived on in the form of wooden side panels and cases for modular synths, it’s not every day that you see a recently-designed keyboard in a wooden case. So we were particularly intrigued by Albert Nyström’s Teensy-Poly6!
The Teensy-Poly6 is powered by a Teensy 3.5, and uses relatively few other components beyond the salvaged M-Audio Keystation 49 keys. The code and schematic can be found on GitHub, and the below video gives a glorious demonstration of the instrument’s capabilities. We’re not sure if the name is a direct reference to 1981’s Korg Polysix, or just a coincidence, since they both feature six-voice polyphony, but the Korgs currently fetch $1-2K on eBay, which makes the DIY Teensy synth look like an absolute steal with a BOM cost of around $120!
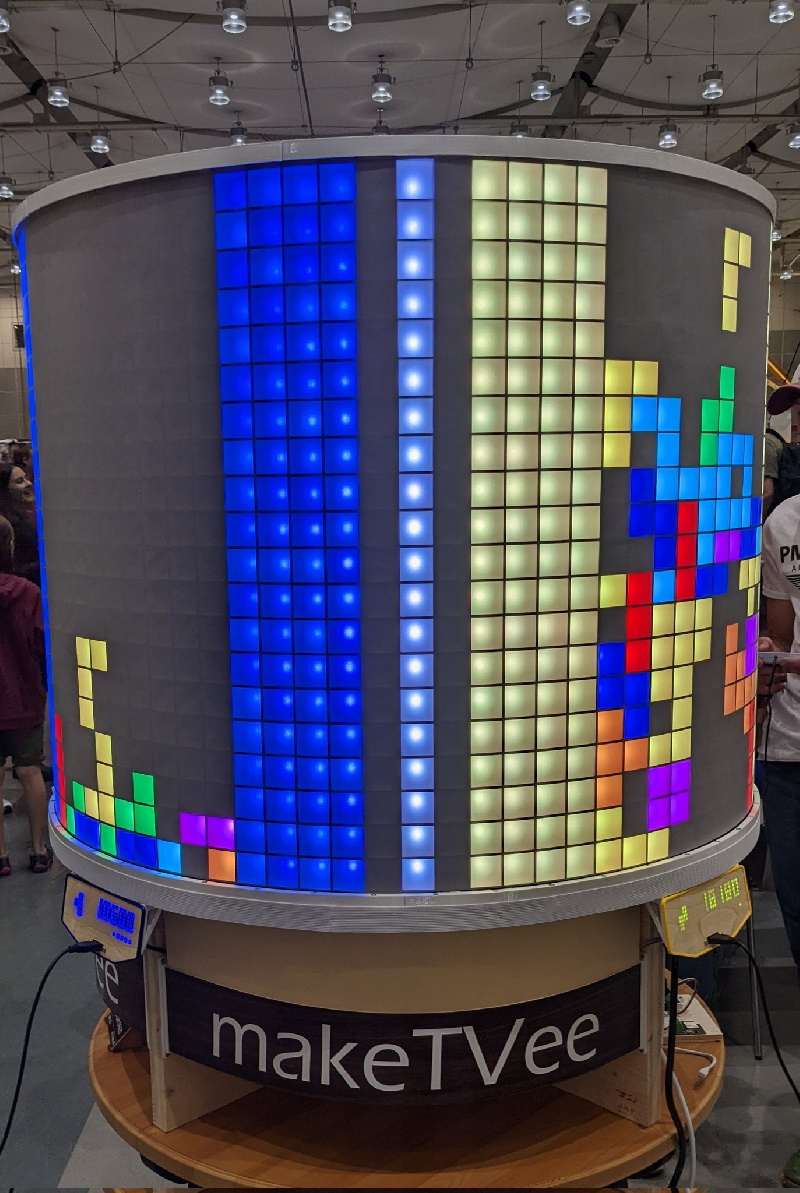
After years of existing only during REM sleep, his LED dream finally crossed the oneiric threshold and became manifest as a 90cm diameter, 70cm tall spectacular cylinder!
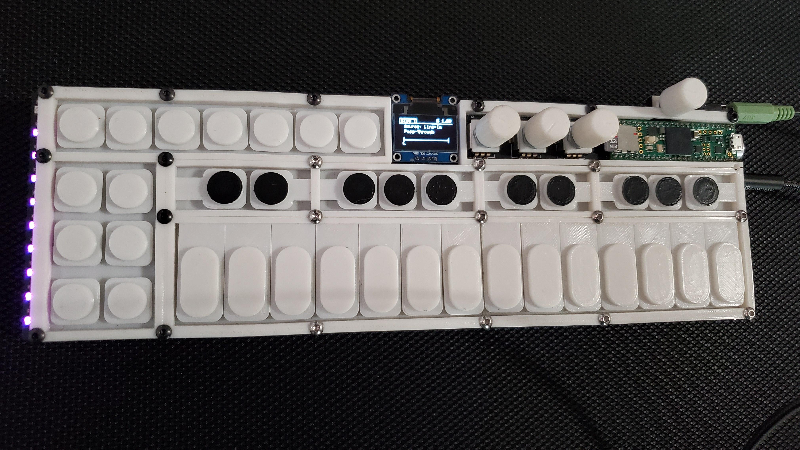
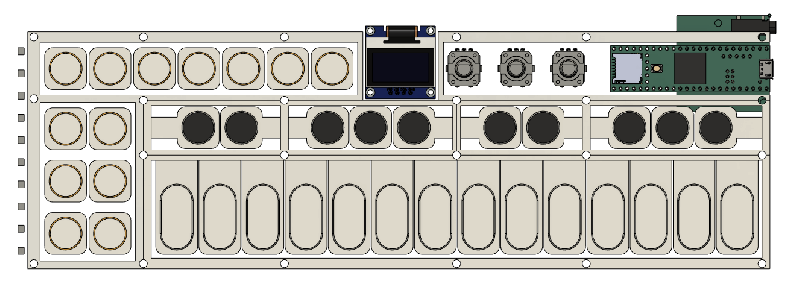
MrCanvas decided to have a go at creating his dream self-contained sequencer, in the form of the Beatmaster2k!
In the mid 1990s, so-called “groovebox” devices began to emerge, which allowed electronic music producers to sequence and improvise music using a single, self-contained…well…box! As digital audio workstation (DAW) music production software became more accessible, producers began to gravitate more toward computer screens, and as control surfaces for these DAWs began to emerge, this gave the best of both worlds: knobs you can touch, with the ease-of-use and expandability of a general-purpose computing device. But not everyone wants to sit in front of a giant screen all day, which is why the industry has seen a renaissance of self-contained workstation devices in recent years.
In addition to a Teensy 4.1, the project consists of an ILI9341 display, two encoders, eight buttons via an MPC23017 I2C I/O expander, a powered USB hub, and a Novation Launchpad Mini Mk3 control surface. It currently supports seven tracks with eight 128-column polyphonic patterns each, edited as matrices on the Launchpad. The source code is available on GitHub, and you can check out the video below for demonstration of this groovebox getting groovy!
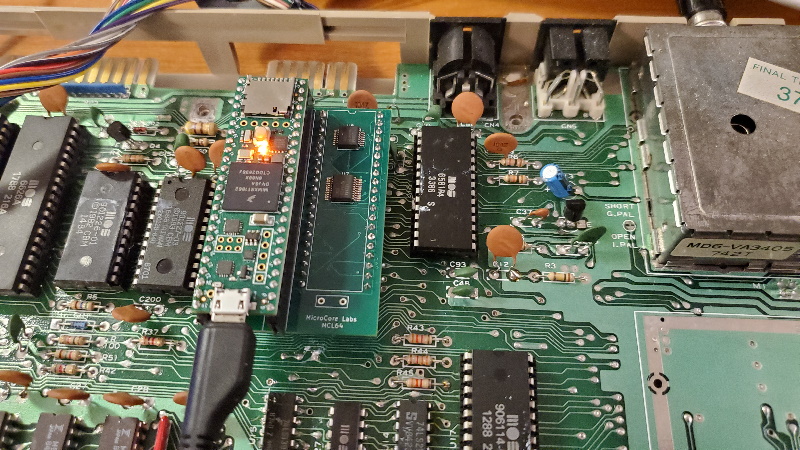
When the Commodore 64 launched in 1982, the venerable MOS Technology 6510 that powered it clocked along at around 1 MHz, depending on region (NTSC vs. PAL).
Fast forward to 2023, and the latest Teensy 4.x models are rated at 600 MHz without overclocking. So what happens when you drag the C64 kicking and screaming four decades into the future? Ted Fried aka MicroCore Labs has the answer in the form of his Teensy 4.1-powered MCL64.
The MCL64 consists of an inexpensive PCB (open-source and available on GitHub), which hosts a Teensy 4.1, and replaces the onboard 6510 CPU. In addition to providing a cycle-accurate mode, the MCL64 may vie for the title of “world’s fastest Commodore 64” when running in accelerated mode: initial testing put it at twice the speed of 1996’s WDC 65C816S-based 20Mhz SuperCPU, with further optimizations improving performance significantly further — and that’s without pushing it to the ultimate extreme with the Teensy’s maximum overclock frequency of 912MHz!