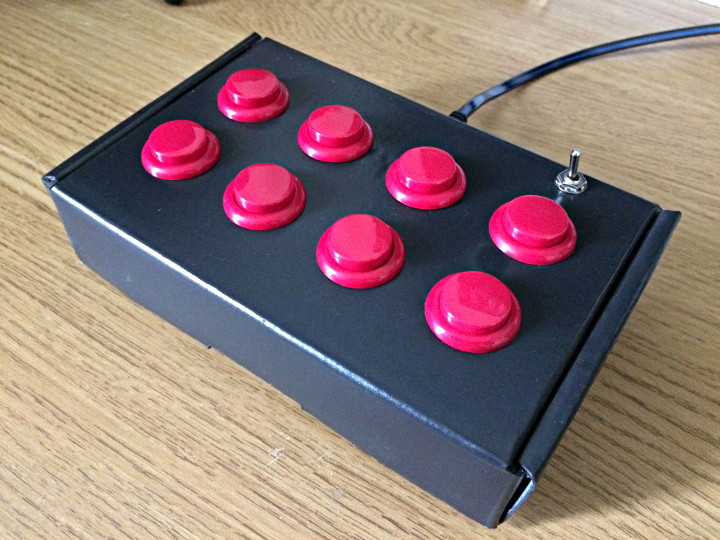
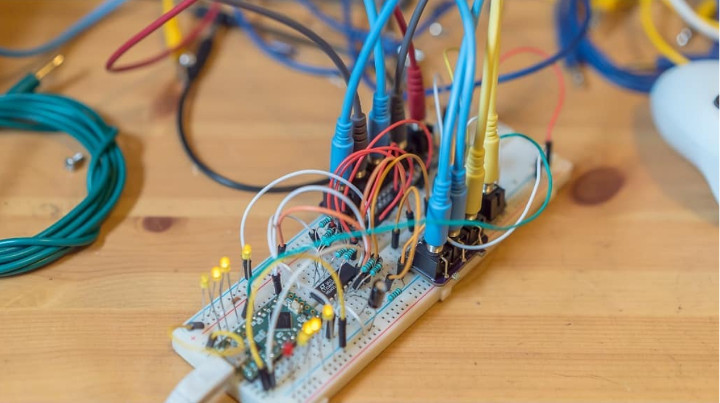
Liam Lacey made a DIY MIDI controller that looks to be a really good introductory project for those wanting to get started building their own controller.
The controller features 8 arcade style push buttons and a switch to toggle between sending note or CC messages. While it may seem limited in capability, it serves as a good introduction to MIDI controllers.
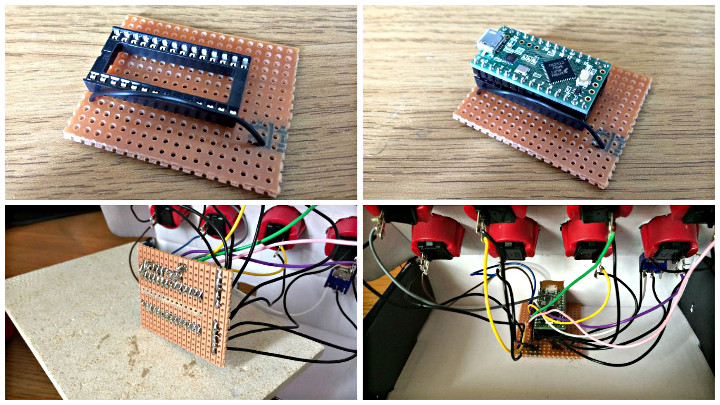
Liam’s tutorial gives a good description of the build process and only requires soldering to connect wires to the push buttons and switch. Connections to the Teensy can be made using a breadboard or a strip board if you’re up for more soldering.
Any MIDI software can be used. In the demo video Liam uses Abelton Live and the Sugar Bytes Turnado plugin.
Matthew Fries, Jeanette Degollado, and Julian Luna created TréPhonos – payphones that have been turned into sculptures that play snippets of spoken history, music, and ambient field recordings captured at significant locations in the neighborhood.
This incredible project was done with Project Row Houses, a Houston arts organization. Each of the TréPhonos uses a Teensy 3.6, an Audio Adapter Board, and a 20W audio amplifier. They run on solar power and have custom 3D printed parts for the Teensy and other components to mount to the interior of the payphones. Whenever you pick up the handset the phone begins playing instructions. Whenever you press one of the buttons #1-9 the phones will play either a song, story, or sound form the neighborhood Third Ward where they are installed. When you hold * whatever you say is recorded into the handset and can be played back by pressing 0. # plays information about the project. The Change Return slot conceals an Easter Egg switch.
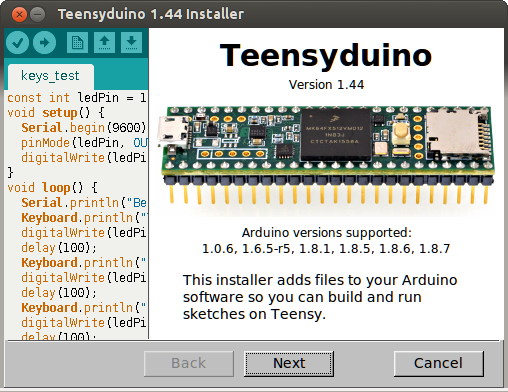
The 1.44 installers are available at the downloads page.
Arduino 1.8.7 Support
Only a few weeks after 1.8.6, Arduino released 1.8.7. With a new Arduino comes a new Teensyduino release to support it.
Arduino 1.8.7 fixes several rare but serious bugs, including issues with the IDE being able to start up. 1.8.7 adds no new features, so there’s no need to upgrade from 1.8.6, unless you’ve encountered issues.
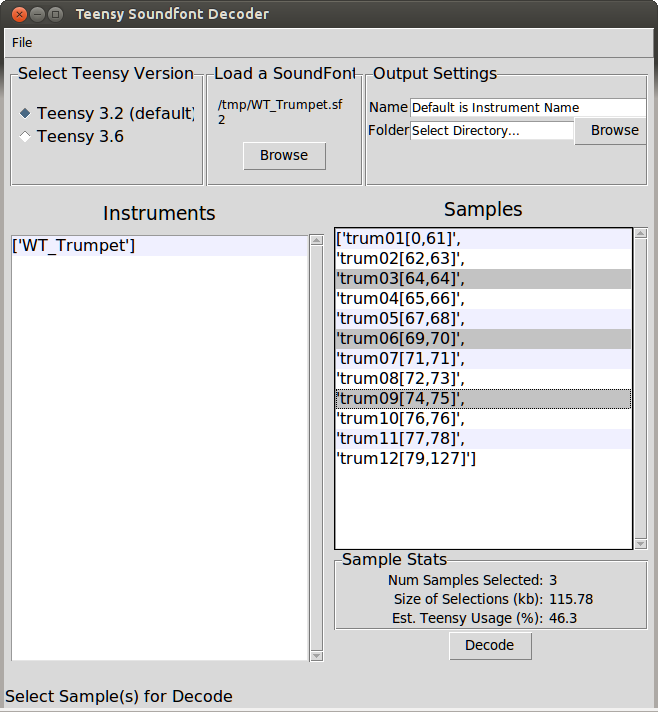
The complete code was published on github. Now with 1.44, this project has been integrated into the Audio library. It’s now available in the design tool, and the examples can be accessed in Arduino by clicking File > Examples > Audio > Synthesis > Wavetable.
Wavetable data is stored in Teensy’s internal flash memory. To create the data, Ryan’s team create a Python utility to import and convert Soundfont format files.
Teensyduino 1.42 greatly improved how Teensy is shown in Arduino’s Tools > Ports menu. But under some circumstances on Macintosh and Windows, a noticeable lag could occur when clicking the Tools menu. 1.44 eliminates this interactive delay, so the Tools menu responds quickly.
The Teensy specific Ports menu is implemented by a native helper program called “teensy_ports”, which Arduino automatically runs at startup. Because this is a native program, it can gain detailed info about USB devices which isn’t available to Java code in the Arduino IDE. In 1.42 & 1.43, when you clicked the Ports menu, a query was sent to this program. When it responded, the info would be put into the Ports menu. But if anything caused a delay in the response, you would see that delay in the appearance of the Tools menu.
Version 1.44 changes teensy_ports to always send USB device changes as they occur. A dedicated Java thread listens for the incoming USB info and keeps a list of devices in the IDE updated. When you click the Tools menu, rather than requiring communication back-and-forth, the list already in the IDE’s memory is copied for use by the menu.
This improvement was partially motivated by a conversation with the Arduino developers. They intend to eventually allow boards like Teensy to provide their own port “discovery” tools, using a JSON-based format. This is one of the major missing features which requires Teensy to have a special installer, rather than using Arduino’s Boards Manager.
Another benefit of switching to the JSON format, which allows communicating all info Arduino uses, is the Tools > Get board Info menu now works with Teensy.
The multithreaded JSON-based Ports menu was developed on 1.8.6 and ported to 1.8.7 and back-ported to 1.8.5, so you get this speedup on any of those versions.
Linux 64 bit ARM (AARCH64)
Arduino 1.8.7 is the first non-beta Arduino release which supports Linux on 64 bit ARM, also known as “AARCH64”. Jetson TX1, Jetson TX2 and Odroid C2 are the main platforms needing AARCH64 support today.
However, Arduino’s downloads page still has ARM64 only on the hourly build and beta build sections. The Arduino 1.8.7 ARM64 file is actually on their server and can be accessed by copying the link to the ARM32 version, and replace “arm” with “aarch64”.
The final hold-up is due to Oracle’s Java runtime environment (JRE) for 64 bit ARM. It is “headless”, meaning it only supports command line programs. Unlike the other Linux copies, there is no “java” folder with the correct Java runtime. As a result, the IDE will use whatever Java runtime exists on your Linux system, which may or may not be compatible.
Here is a copy of Arduino 1.8.7 with a compatible copy of OpenJDK added in the “java” folder. Other this this addition, it is identical to the Arduino 1.8.7 file on Arduino’s server.
Just extract this file, then download and run the Teensyduino 1.44 installer. Like all Linux systems, Teensy’s udev rule file must be installed to access the USB device files.
The default kernel that ships with Jetson lacks the cdc_acm driver needed for USB serial communication. You can still use Teensy without this this driver, because Teensy Loader uses HID protocol, and the new Ports menu is able to natively detect USB devices even when their drivers don’t load. But to use the serial monitor with a Teensy programmed to be USB serial, you will need to install the cdc_acm driver. If following those instructions, you may need to type “./installCDCACM.sh” to run the script, rather than “./installCDCACMModule.sh” as the instructions say.
Obviously AARCH64 support is very new. If you encounter issues, please report them on the forum.
Rolf Hut made an awesome Anti-Hug Hat, or personal space protector, for Burning Man this year.
The Dutch scientist wanted to explore working with Teensys and APA102 LEDs – and wanted a way to try to avoid the typical American hug at Burning Man, so he came up with the Anti-Hug Hat. The hat has acoustic distance sensors around it an when an object (like a person) gets too close, the ring of LEDs around the hat change from green to orange to red.
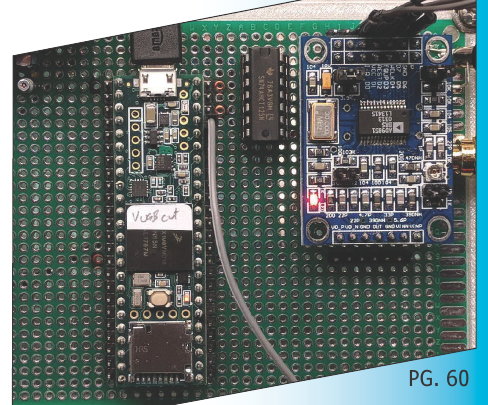
He needed something to control scripted chord progressions in Dreamfoot, an app for free-floating synth pad accompaniment and was inspired by the iRig BlueBoard, but wanted to dumb it down a bit. He made use of a Teensy 3.2 microcontroller to interpret the switches and send MIDI data over USB. The code for the Teensy was posted by Liam Lacey at Ask.Aduio.
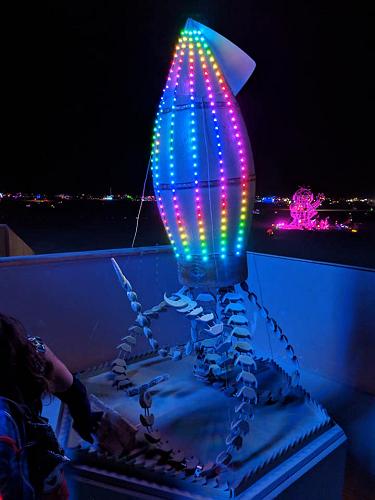
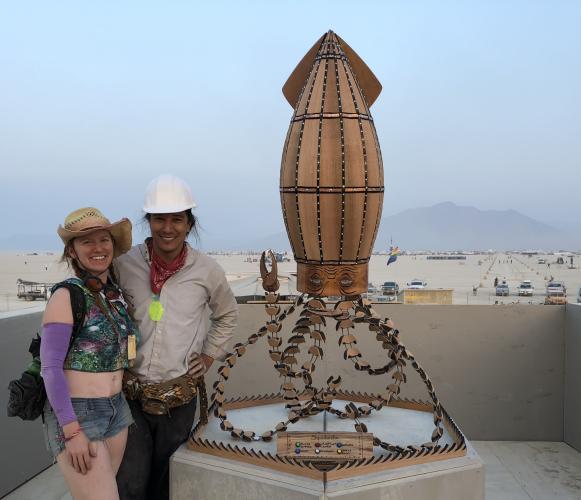
Alexander “Wolf” Griffen designed and built Squidartha, a beautiful interactive burn-bot for Burning Man.
In response to Burning Man Arts request for proposals for Burn-bots to be displayed in The Man Pavillion, Wolf came up with the oceanic themed Squidartha. He was inspired by the intelligence and curiosity of the squid he’s seen while scuba diving.
The 6’6″ tall sculpture features strips of programable LEDs with nine animation patterns driven by a Teensy 3.2 and the OctoWS2811 library. It included a control panel of 6 buttons for people to interact with the art with each of the buttons activating a different programming sequence.
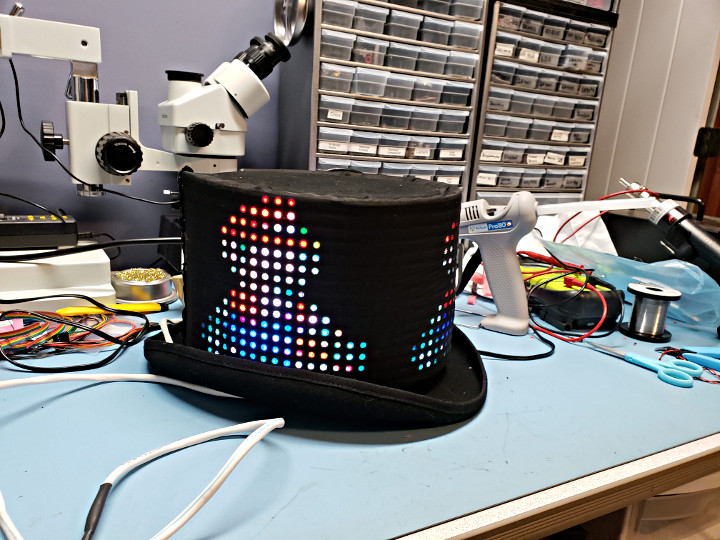
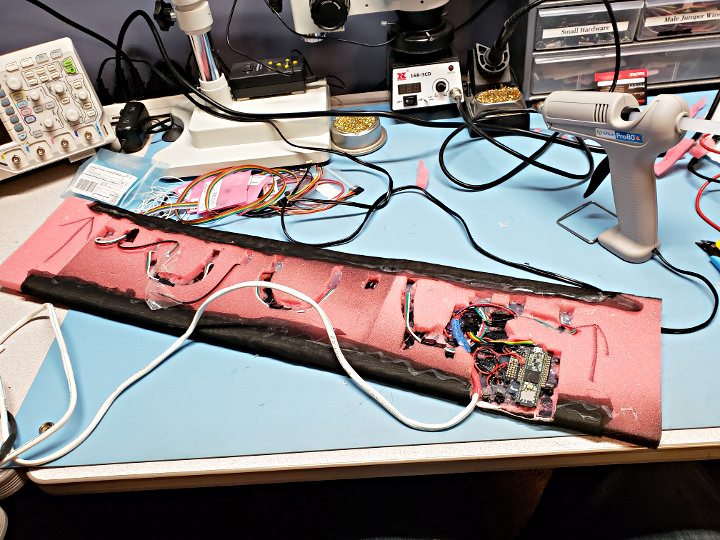
The project was inspired by a robotics competition. Matthew is a mentor for the team an wanted show how to have some fun with engineering. The hat uses 4 flexible 16×16 RGB LED panels, a Teensy 3.6, other miscellaneous parts, and LOTS of hot glue.
This imugr gallery has a pretty good write up on the assembly process.
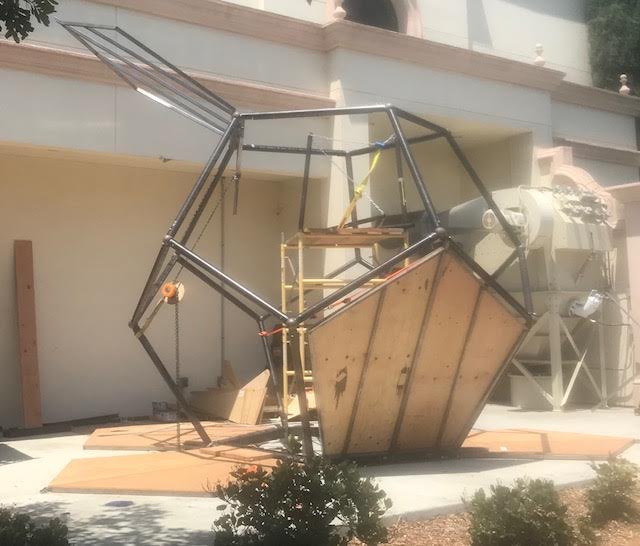
Max Elliot was part of Unfolding Humanity, an amazing art installation at Burning Man this year.
This project was built by a team at the San Diego Geometry Lab. The sculpture is 10′ tall and unfolds to 40′ wide. It features 26 Teensy 3.2s with OctoWS2811 adapters and NRF24L01 radios. Mirrors on the inside of the structure create a kaleidoscopic effect.