Blog Posts

Pinbox Jr. – USB Pinball Controller

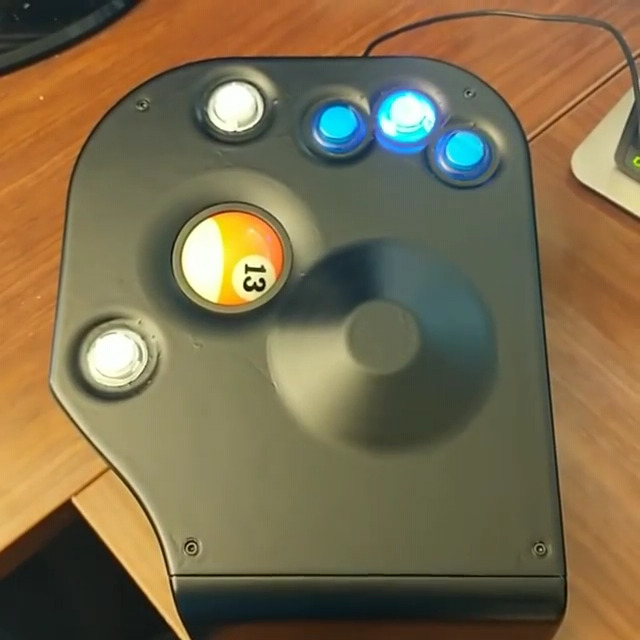
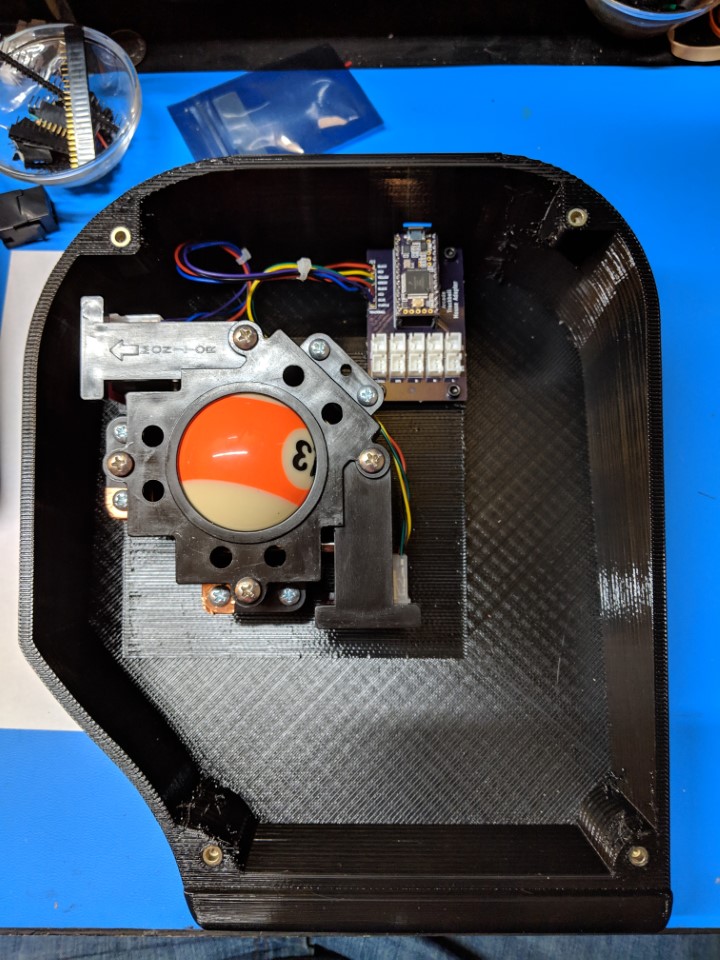
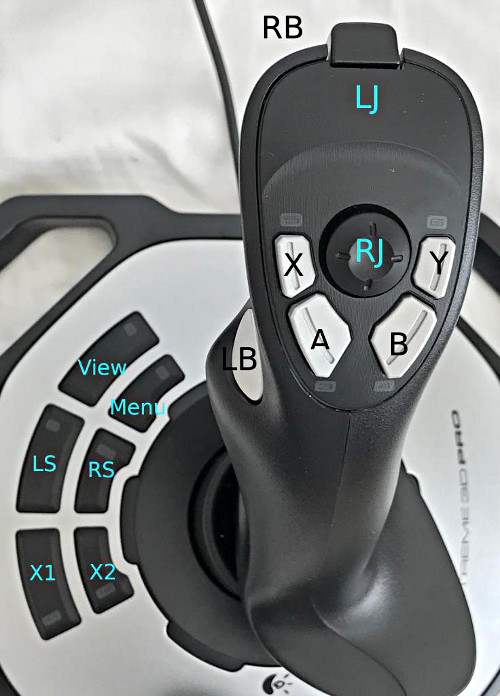
Loyal J made a cool USB pinball controller, Pinbox Jr,  to use on your PC.

The Pinbox JR is a USB controller that gives PC games the feel of playing on a real pinball table.  It interfaces with a PC as a USB keyboard and maps the pinball buttons to various keys on the keyboard.  The latest version of the Pinbox Jr includes an accelerometer to simulate the tilt feature if you shake the controller.

Code for the project can be found on Github

Handheld Tactile Switch Keyboard

Anthony DiGirolamo has made a great Teensy Thumb Keyboard.

This small tactile keyboard is super to use with handheld projects.  It has 60 keys arranged in a QWERTY layout and number keys arranged in a number pad layout.   The board has beginner friendly through hole soldering with a Teensy, 60 pushbuttons, and 10 zener diodes.

Anthony used this thumb board to make a handheld Raspberry Pi.  Using the Teensy he was able to add backlight control and low batter monitoring in addition to controlling the keyboard.

Code for the project can be found in the Teensy Thumb Keyboard Github repository.  KiCad files are available or you can also order the PCB from Tindie.  Finally, you can find the files to 3D print the case used for the handheld Pi project on Thingverse.

Monolith Synth

Ben Davis, Darcy Neal and Ross Fish collaborated with Paul in early 2017 this Monolith Synth.  It was shown at Tested and the San Mateo Maker Faire.

The Monolith Synth is interactive sound sculpture, with 40 “arcade” buttons on the front as a percussive step sequencer and 2 touch-sensitive side panels for direct performance.

Typical usage scene at Maker Faire, with kids and adults playing with it non-stop all weekend long.

This crazy adventure started with Kickstarter reached out to me, only 6 weeks before Maker Faire, looking to showcase 4 successful projects in their booth. They wanted to show “creative tools” and how people used them. So I reached out to a few synthesizer folks I’ve met and who’ve used Teensy. They also suggested bringing it to Tested to make a video. So it began…

From the beginning I had a step sequencer using illuminated arcade buttons in mind. So I quickly designed this little I/O expander board and sent it off to OSH Park’s Super-Swift service.

The whole project came together over just 4 weeks. Our first meetup was just to discuss what to build, followed a week later by our first build night. By then the I/O expander boards had arrived. We made not the final Monolith, but 3 breadboard prototypes, so the software development side could begin!

Another meetup focused only on software. Almost all the software was developed on these prototype panels.

In this picture you can also see the panel layout sketches on the notepad on the right side, and a blue tape model underneath on the table, which we made to get an idea of the overall size.

Ross and Darcy had synthesis plans that needed a signal-controlled PWM waveform and improvements to the envelope feature, so I worked on improvements to the Teensy Audio Library while they wrote the Arduino sketch code.

The day before our next meetup, I started turning those sketches into a design for the laser cutting. I made this 1/4 scale model of the front and side pieces. At this point, none of the back side or interior ribs (for strength) had been designed, and you can see the model lacks the many holes for screws & brackets which joined everything.

Only 2 weeks before Maker Faire we had an epic 13-hour build day where all the final parts were laser cut and assembled. Here’s a photo of Darcy & Ben putting the panels together on my kitchen counter!

All the clear acrylic plastic parts were completely drawn, with all mounting holes, and made that day.

Here’s the complete layout of all parts (mk2017_design):

Here’s a large high-res copy of this image, and a big ZIP file with all the original Corel Draw files for anyone who wishes to try making their own.

While the laser did most fabrication work, other steps like countersinking for the potentiometers were needed. It was indeed an epic 13 hour day of making.

A couple days later, I spent a whole day completing the wiring we couldn’t get done in those 13 hours. Erin Murphy (the “Soldering Goddess” at PJRC) put in a few hours on aesthetic improvements to the messy tangle of wires from so many buttons.

Just a few days later we had our last “build” session, to get the 3 separately written Arduino sketches merged and working together as one integrated project. Even though everything has been designed to go together, this session went very late. Ben did much of the heavy lifting to merge the 3 programs.

This is the final audio DSP system settled upon that late night.

Here’s a large high-res copy of this image.

This was the first actual usage of the Monolith, well past 1am when we finally had it all up and running.

The next day I took it all apart and packed all the pieces and spare parts into these 2 big boxes, weighing in at 55 and 40 pounds!

This is the first time I’ve ever shipped a project to Maker Faire, rather than driving a truck or hauling cases of checked baggage on a plane. So much easier, and it allowed time to work on a nice handout card. After some back and forth with the others and last-minute proof reading by Robin, who caught what would have been embarrassing typos and grammatical errors, we sent this card off to be fast-turn printed.

Here is a printable PDF file for the front side.

Here is a printable PDF file for the back side.

Darcy and I flew to San Francisco early and spent the day with Tested, putting it back together while they shot that awesome video. Sometime I hope to have even 1/10th that sort of video production skill.

Since it was already put together, we had little to do setup-wise. Friday morning Ben, Ross and Darcy did some adjustments of the sound levels which really made it come to life in the space. For anyone who wishes to dig deeper into the technical details, the complete source code is available on Github.

All weekend long people really enjoyed playing with it. There were many really awesome moments, like this young & determined girl playing with the front panel (Facebook link).

The look on this kid's face just made my day! Maker Faire is this girl's jam. Kickstarter + #teensy

Posted by Clarissa Redwine on Saturday, May 20, 2017

Here is Kickstarter’s coverage of the event. Scroll down a bit to the part about Teensy. 🙂

During the 3 days of Maker Faire, things went very well. We did experience a couple minor issues. Massive electrical noise from so many other projects played havoc with the capacitive touch sensing. Saturday evening I rewrote the code to look for changes from an average rather than just an increase from a threshold, which allowed it to usually work well enough. The other tech issue was a bass. When turned up louder, the bass notes would shake all the plastic panels, rattling screws and even some of the connectors loose at time. Easy to fix.

Towards the end of Sunday, the Maker Faire folks came around and gave up an award. At first I shrugged it off, since they’ve done the same for other stuff I’ve brought in prior years. But those were the blue ribbons. Apparently the only hand out one of these red one each in “zone”. They said it’s a big deal…

Really, the best thing about this year was working with a great team. Ross, Darcy and Ben really stepped up and did a great job on so many parts.


Shortly after Maker Faire 2017, this article was posted to the DorkbotPDX website.  Since that time, the DorkbotPDX blog section has vanished.  We’re reposting it here, to preserve this project’s history.  A copy of the original can also be found at the internet archive.

On 2018, the OctoWS2811 LED board was added to the Monolith Synth project and shown at the Teardown 2018 conference.

The Monolith Synth will make its next public appearance at Portland’s Winter Lights Festival in February 2019.

Using Rust Language on Teensy 3.2

Branan Riley has published a series of very informative tutorials  – Exploring Rust on Teensy.

The tutorials are targeted at people who have a basic knowledge of Rust and “lightweight” embedded development experience.  The first tutorial covers bootup of the processor to getting the LED to blink – with a good number of topics covered in between.  Parts two and three go on to cover serial communication and hardware allocation.  Each of the tutorials has quite a lot of information and detailed explanations of a number of topics important in embedded development.  Overall this series is a great way to get going on programming Teensy using Rust.

Branan has indicated that the next tutorial in the series will cover DMA (Direct Memory Access) and interrupts will be in another upcoming tutorial

The tutorial series can be found on Github.

Light Up Coat

Forum user Austin519 made a stylish, sound reactive LED light up coat.

The coat features 673 WS2812 LEDs driven by a Teensy 3.2, Prop Shield, and an ADMP401 MEMS microphone.  It’s powered bu 2 5200mAh lipo batteries.  It includes some user controls to change the pattern, sound reactivity, and overall brightness.

DIY Drum Machine at Fasma Festival

Tomash Ghzegovsky made a very cool DIY drum machine for the 2017 Fasma Festival

The goal of the project was to come up with something small, affordable, and buildable in just a few hours.  The result was this portable, battery-powered drum machine.

While this drum machine may be small in size, it’s not small on features.  It has 4 voices (kick, tom, snare, and hat) and 4 parameter controls per voice – pitch, decay pitch modulation, and distortion.  A 9V battery will power this little guy for up to 7.5 hours.  More information on the features can be found on this GHZ LABS page.

Tomash put some great documentation together so that you can build your own.  A manual, schematics, bill of materials, gerber files, and firmware are all available on this GitHub page.

One-Handed Macro Pad

Kerry Scharfglass got this 28″ Surface Studio.

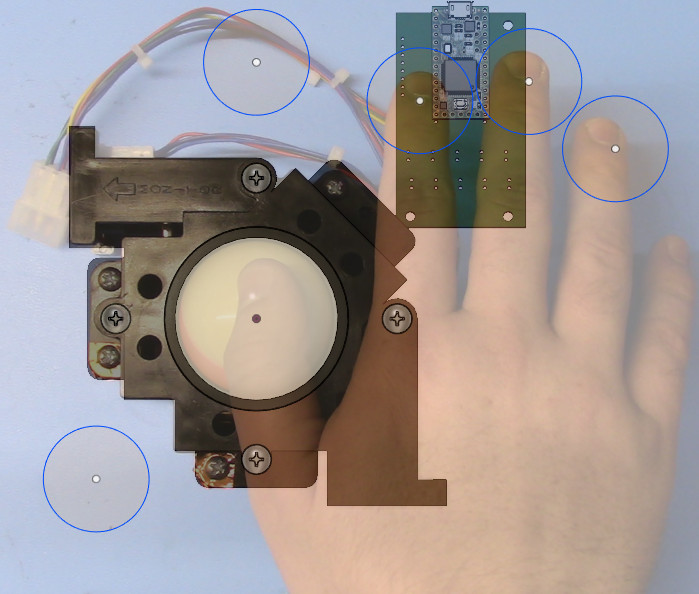
The “feels like Minority Report” touch/pen interface was less than ideal for KiCAD, so he build this one-handed keyboard macro pad.

Watching people use the Surface studio has been interesting.  It seems to have some great potential, but functionality with most software programs is lacking and seems to make the Surface awkward to use.

This project is a great example of using Teensy and some DIY ingenuity to improve usability.

Designing a PCB from the comfort of your couch seems pretty enticing.  Maybe DIY projects like this one can make this a reality.

SPI & I2C Slave Controller for Multiple Boards

Tony Brewer, forum user tonton81 developed a library for a master board to control multiple slave boards.

This library allows you to take advantage of the speed of SPI when communicating between 2 Teensys, making it much faster than ordinary serial.

The lengthy forum thread where this library was developed documents the collaborative effort that made it happen.

The code, along with some details on the features, can be found on GitHub.


Quantum Garden

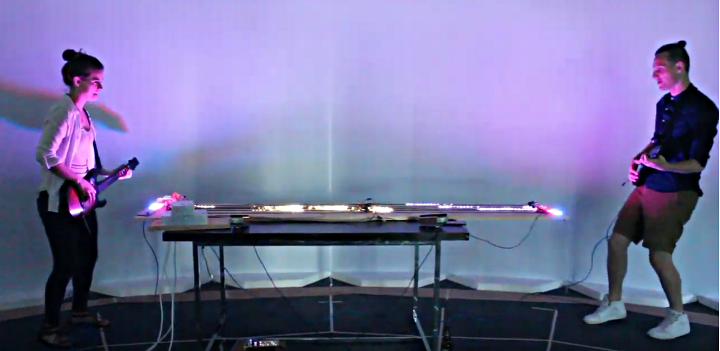
Robin Baumgarten created the Quantum Garden, a beautiful interactive art installation that visualizes the STIRAP (stimulated Raman adiabatic passage) quantum process.

The piece uses 228 neopixel rings with 16 LEDs each.  Inside each ring is a springy door stopper that when touched generate fractal-like effects.  It uses 3 Teensy 3.2 boards and a PC running a Python script to simulate the quantum problem.

The Quantum Garden is connected to the Quantum Black Box, a sophisticated software device developed by quantum physicists.  When people touch the springs they aren’t just making pretty light patterns happen, they are generating inputs that will be processed by the Quantum Black Box and used to help solve an important scientific research problem.

Additional information on the project can be found on the Quantum Garden web site.

The project is a collaboration between the University of Turku Schools of Science and the School of Arts, Design and Architecture at Aalto University, and sponsored by the Centre for Quantum Engineering.

How To Get Tech Help From Strangers On The Internet

Online tech forums can feel intimidating.  Three simple things can greatly improve your experience & odds for useful help, regardless of your skill level.

Good First Impression

“You get 1 chance to make a good first impression” is timeless wisdom. Strangers will quickly form an opinion of you, based only on the words, images or video in your message.  Make your words count!

Showing you’ve made an effort, more than any other factor, will influence people to help.

But if you’re an absolute beginner, what sort of effort can reasonably be expected?  Anyone can try a Google search using the words from their question.  Many experts have long forgotten how difficult finding relevant info can be when you don’t know the proper terms, or unrelated tech has since started using those words.  Just explaining the search you tried and confusing or off-topic info you’ve seen can go a long way towards helping seasoned experts to understand your struggle.  The results aren’t important, your personal effort is what matters!

Genuine interest to learn also tends to make a good impression.  Even a few words can really communicate your attitude.  Frustrated but determined to learn from a trying experience can make a great impression.  Very smart people who can help the most tend to appreciate genuine & candid communication.

Of course if you have started a project or done work, mention it.  Or better, show what you have tried.  Screenshots, photos or even a quick video can powerfully demonstrate what you’ve done, and cover the other 2 aspects of a successful forum question.

Even just a few extra words, which show you are making a sincere effort and sincerely wish to learn, can make an improvement in the response you’ll likely receive.

Context Brings Understanding

Humans have amazing capability to genuinely understand.  Experts can sometimes apply their tremendous knowledge towards creative ideas to solve your problem… when they actually understand what you really need.

Providing context in your question is key.  What are your larger goals?  How does the question you’re asking fit into your project?  What do you ideally hope to accomplish?  And why?

When working on a technical matter, it’s easy to focus on only the issue at hand.  Remember, good people with vast knowledge & experience regularly read forums, just because they enjoy helping others.  When composing your forum question, don’t forget to give context.  It can make the difference between answers that are at best technically correct and answers that are truly insightful.

Details Are Essential

Modern technical issues can involve a mind boggling number of details.  How much raw information should your question include?  Before posting, try asking these questions:

  1. Can readers SEE or EXPERIENCE your problem?
  2. Can readers REPRODUCE your problem?

It’s easy to joke “I saw an error, but clicked OK without reading”.  But seriously, a basic level of detail allows everyone reading your message to see the problem.  A screenshot or exact copy of an error, plus specific information about software, hardware, and steps taken are a baseline for your readers to merely attempt to see the problem as you did.

Ideally, people reading your message would be able to reproduce the problem.  Providing this level of detail is not always practical.  But if you can give enough info, odds of someone solving the problem are vastly improved.

Software programming questions should include complete source code, not merely the small fragments.  Often code issues involve subtle details, such as declarations of variables elsewhere in the code.  Some experts can spot these sorts of problems with amazing speed, if you show complete code!  Don’t forget to be specific about any extra libraries used.

Electronic hardware issues usually need photos or accurate wiring diagrams, and links or part numbers of materials used.

It’s common to feel nervous or self-conscious about showing your project details on a forum.  Don’t be shy.  Experts who regularly read the forum genuinely want to help.  Show enough detail, give context and demonstrate you’ve made some effort and odds very good they will help!

Common Pitfalls

Forums don’t always work ideally.  Usually the 3 steps above will lead to good results, but there are a number of common problems to keep in mind.

Too Much Diagnosis

Technical problem solving involves observing the effects of an issue and trying to deduce the cause.  A very natural human tendency writing while in this mindset is to focus moreso on the presumed causes than objectively sharing the observed effects.

Usually a short break between an intense debugging session and composing your forum post can make a tremendous difference.  When writing, try to think of your reader’s perspective.  Are you asking people to help diagnose the problem, or merely asking them to nod “yup, you’re right” in agreement with your existing conclusions?

However, sharing your thought process can avoid people needlessly covering the same ground you’ve already investigated.  There is no one perfect way.  Just keep in mind that too much diagnosis can shut people out of helping you troubleshoot.

Venting Frustration

Let’s face it, some technical problems are really hard, even intensely frustrating.  When you’re annoyed, venting frustration is a very natural human tendency.

Before you post on a forum, creating that all-important first impression with strangers, review your message.  Some level of expressed frustration is normal and maybe even helpful.  It can show you’ve really tried.  Just beware the common trap, where your forum message ends up being perceived as a rant rather than a question or request for help.

Nobody Replies

Even under ideal conditions, sometimes forum posts get no replies.  This can feel disappointing & disheartening.  Try not to let that emotion take control as you compose a reply to “bump” the thread.  You can do much better.

Effort matters.  If days or weeks have elapsed since your first post, presumably you’ve put more effort into the project?  Even if fruitless, the personal effort you’ve invested since your prior post is something you can share that tends to draw people in.  Photos or code or other clear signs of work on your part can be highly effective.

Sometimes very difficult questions, with plenty of detail, get no replies simply because nobody knows the answer.  Or nobody knows with certainty.  Asking for opinions or ideas for directions to try can really help in these cases, turning what started as a solid question into a more fluid conversation.  Again, apparent effort is the key factor that attracts people to contribute towards helping solve a tough problem.

Most forums discourage or even ban posting duplicate copies of your question, or “cross posting”.  Posting the exact same message in multiple places at the same time is almost never a good idea.  Experts who regularly read the forums, the people most likely to help you, will almost certainly notice.  You get one chance to make a good first impression.  However, after a period with no answers, sometimes duplicate posting can be done gracefully, usually with an explanation & link to the prior unanswered question.

Academically Dishonest Students

Every tech forum gets lazy students asking people to do their homework.  Experts who regularly read forums are inundated by these low-quality questions.  Like an email inbox with spam, the last thing you want is your message to be mistaken for more junk & quickly dismissed.

If you are doing a student project, usually the best approach is to be honest about the academic nature (and deadline) and to make sure your sincere effort shines through.  Earnest effort and genuine desire to learn is what distinguishes good students in the minds of experts who will actually help!

Proprietary Projects

When you can’t share source code or other relevant technical details, technical forum help is rarely effective.

Usually you must invest extra effort to separate just the one piece that is problematic from the rest of your project, so it can be shared.  If you have not done this, consider that asking “has anyone seen a problem like XYX” is essentially asking humans to function as a search engine.  Sometimes the results are good (better than you could do with Google), but difficult technical problems without sharing relevant details are rarely solved by blind guessing.

If your employer or organization absolutely will not allow any code or details shared, no matter how trivial, perhaps using “enterprise” products which come with support contracts, or hiring a private consulting firm is more appropriate than asking on a public forum.

After Your Question Is Answered

The best way to say “Thank You” is to acknowledge who had the right answer.  Many experts pour countless unpaid hours into helping strangers on forums, simply because it feels good to be helpful.  Being recognized as supplying the correct answer is a nice reward.

When your problem is solved, please consider Google and other search engines may send people with similar technical questions to your messages for years to come.  The very best thing you can do after a technical problem is resolved is a quick but clear message confirming the solution.

If you posted on multiple forums, please take a few minutes to follow up on every thread with a link to the message with best answer.

About This Article (and Me)

Over the last 6 years, I’ve written 18620 answers our forum here at PJRC, and many more on numerous other forums.  During this time, we’ve managed to grow a pretty good forum community and help many thousands of people with projects.

I watched and tried to learn which what has worked and how we might improve.  One thing that’s become very clear is so many people need a little guidance on how to best ask their questions.  It’s not the technical nature, but these subtle human factors that matter most.

My hope is to see all tech forums improve.  Please, share this article.

-Paul Stoffregen