Arduino Ethernet Library 2.0.0

Today I released the Arduino Ethernet Library version 2.0.0, for all Arduino boards (not just Teensy).

Version 2.0.0 adds many new features and greatly improves performance.  Here’s a detailed look at what’s new.

Auto-Detect Hardware

All 3 SPI-based chips from Wiznet, W5100, W5200, and W5500 are supported.  Ethernet.begin() automatically detects which chip you have connected.

The chip detection process uses the Wiznet software reset command followed by 2 write and read-to-verify checks on the main configuration register, for very robust hardware detection.

Ethernet.init(cspin), an extension added in Adafruit’s Ethernet2 library, is also supported, so you can use any digital pin for the CS signal.

Performance Improvement

Version 2.0.0 greatly improves performance.  Optimizations at multiple levels within the library work together to vastly improve performance, especially on the oldest W5100 hardware, and also make the most of the newer W5200 and W5500 chips.

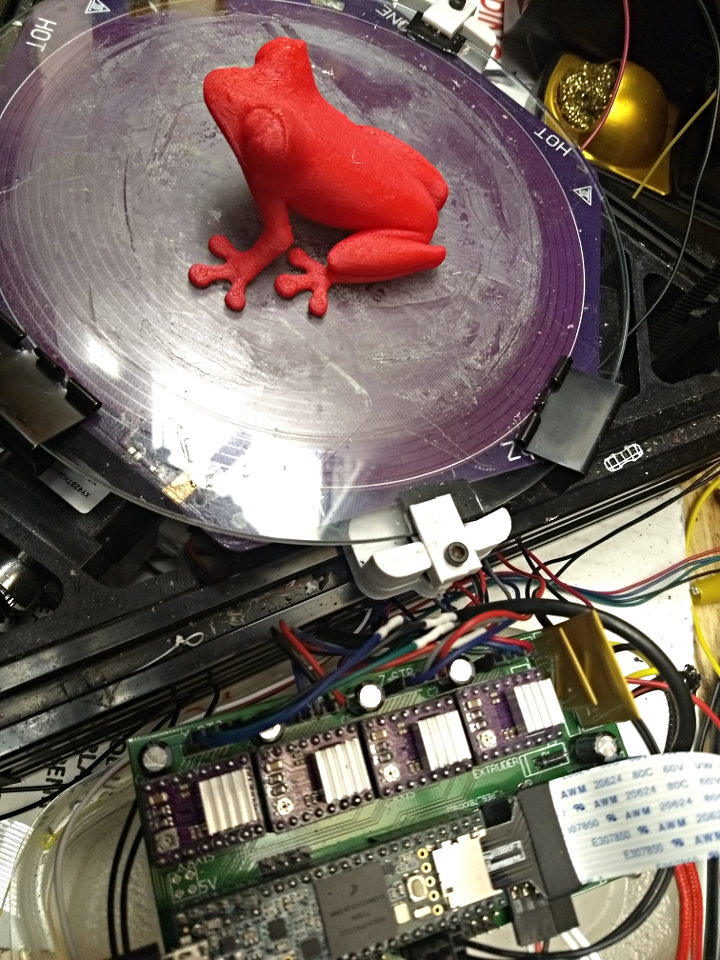
A a tremendous amount of work went into these optimizations.  In this photo you can see the setup for debugging timing issues with WIZ812MJ (W5100) and Teensy 3.2, using a 4 channel oscilloscope to monitor SPI communication and an active network tap to monitor the Ethernet packets.

The 2.0.0 performance optimizations are performed on 6 levels.  Here are details, from the highest to the lowest level.

1: Caching Socket Registers

The Wiznet chips transmit and receive Ethernet packets with their internal buffer memory.  Each socket’s buffers are managed using several 16 bit pointer registers within the chip.  Previously these registers would be read and sometimes updated for every access, using many bytes of SPI communication, even just to check whether data is available.

A small amount of memory on the Arduino side is used to cache these registers, which greatly reduces non-data SPI communication.

2: Immediate TCP ACK

By default the Wiznet chips have a feature to delay sending TCP ACK packets.  For simple programs which read 1 byte at a time, this makes good sense, since you wouldn’t want to transmit a flood of ACK packets for every single received byte.

The socket register caching also allows the number of Sock_RECV commands written to the chip to be greatly reduced, even for simple Arduino sketches which read 1 byte at a time.  This allows Ethernet 2.0.0 to control the timing of ACK packets, immediately when the Sock_RECV command is used to update the chip’s buffer pointers.

W5100 chips see a tremendous TCP speed boost, because the delayed ACK feature was poorly implemented in that old chip.  Even W5200 & W5500 speed is improved, especially when larger buffers are used.

3: Block Mode For Data Transfer

All SPI commands have overhead, 3 bytes on W5100 & W5500, 4 bytes on W5200, before actually communicating data.  On W5200 & W5500, after suffering this overhead, “block mode” allows many bytes can be transferred using a single command.

When your Arduino sketch reads or writes multiple bytes, these efficient block mode commands are used.  Other libraries, like Adafruit & Seeed Studios Ethernet2 have used this block mode for data transfer.

4: Block Mode For Registers

Unlike other libraries for W5200 or W5500, the efficient block most is also used with accessing 16 and 32 bit registers.  In addition to nearly cutting the register access time in half (and register access is done much less often due to caching), block mode also greatly reduces the chances that a register which may change will being read will need to be accessed more than twice to get the same value.

5: SPI Block Transfer

The SPI library has a block transfer function which is optimized to reduce delays between bytes on the SPI bus.  W5200 & W5500 now leverage SPI.transfer(buffer, size) for a significant speed increase when used with boards having a SPI library which optimizes this function.

6: Native CS Pin Control

Control of the CS pin in version 1.1 was done using hard-coded register access to pin 10.  While very efficient, only certain boards were supported and using any other pin required editing the library.

Version 2.0.0 allows any digital pin, but still uses efficient access to GPIO registers on most boards.  All AVR, SAMD, SAM (Arduino Due), PIC32, Teensy and ESP32 boards are supported.  On others, the CS pin control uses ordinary digitalWrite.

Client Functions

EthernetClient has 3 new functions similar to the ones from EthernetUDP.  The remoteIP() function is very nice after connecting, if you used a name and DNS found the IP number.

remoteIP()
localPort()
remotePort()

Timeout Control

When things don’t go as expected, the default timeouts can be quite lengthy.  Especially when communicating on with local devices on the same LAN, you might like much shorter timeouts.

Ethernet.setRetransmissionTimeout(milliseconds)
Ethernet.setRetransmissionCount(number)
client setConnectionTimeout(milliseconds)

The connection timeout is how long to wait when trying to connect to a server, or for stop() to wait for the remote host to disconnect.

Server Functions

EthernetServer now has an accept() function, for use by more advanced projects.  The traditional available() function would only tell you of a new client after it sent data, which makes some protocols like FTP impossible to properly implement.

The intention is programs will use either available() or accept(), but not both.  With available(), the client connection continues to be managed by EthernetServer.  You don’t need to keep a client object, since calling available() will give you whatever client has sent data.  Simple servers can be written with very little code using available().

With accept(), EthernetServer gives you the client only once, regardless of whether it has sent any data.  You must keep track of the connected clients.  This requires more code, but you gain more control.

EthernetServer now also has a boolean test, which tells you whether the server is listening for new clients.  You can use this to detect whether EthernetServer begin() was successful.  It can also tell you when no more sockets are available to listen for more clients, because the maximum number have connected.

Hardware Status

Version 2.0.0 adds two functions to help you diagnose hardware issues.

Ethernet.hardwareStatus() tells you which Wiznet chip was detected during Ethernet.begin(), if any.  When “nothing works” this can help you discover whether your Ethernet shield hardware is good and you should check for networking issues, or if you need to work on the hardware first.

Ethernet.linkStatus() on W5200 and W5500 tells you whether the link is active.  Sometimes things don’t work only because a cable is unplugged.

All the examples updated have been updated to use these, for better troubleshooting.

Direct Settings Control

Now you can access the network settings after Ethernet.begin().  These are meant to be used in manual configuration mode, not with DHCP.

Ethernet.setMACAddress()
Ethernet.setLocalIP()
Ethernet.setSubnetMask()
Ethernet.setGatewayIP()
Ethernet.setDnsServerIP()
Ethernet.MACAddress()
Ethernet.localIP()
Ethernet.subnetMask()
Ethernet.gatewayIP()
Ethernet.dnsServerIP()

Boards Tested

I attempted to test Ethernet 2.0.0 with as many boards as possible.

Arduino Uno R3 and Arduino Leonardo

Arduino Uno Wifi Rev2 (pre-release sample) and Arduino Zero

Arduino Mega 2560 (counterfeit/clone – sorry Massimo…)

Arduino 101 Intel Curie and ChipKit Uno32

Arduino Due

Arduino MRK1000

Teensy 2.0, Teensy LC, Teensy 3.2, and Teensy 3.6 Reference Board

Adafruit Huzzah ESP8266 Feather and Huzzah32 ESP32 Feather

Shields Tested

Arduino Ethernet R2 (hand soldered) and Arduino Ethernet R3

Arduino.org Ethernet2 and Seeed Studios W5500 Ethernet

Wiznet WIZ820io on hand-soldered protoboard adaptor

Arduino MRK ETH (pre-release sample)

Wiznet WIZ850io with Teensy adaptor, WIZ820io, and WIZ812MJ.

Adafruit FeatherWing Ethernet and WIZ820io with MKR adaptor

ESP8266 SPI library requires issue #2677 fixed – transfer(buffer, size)

ESP32 SPI library requires issue #1623 fixed – transfer(buffer, size)

Benchmarks & Test Results

Four tests were run on every board+shield tested.

WebClient (local) is a copy of the WebClient example, modified to access a Linux web server on the same LAN, where packets have only the latency of a layer2 Ethernet switch, less than 0.1 ms.  This test primarily measures the SPI communication speed and CPU overhead.  Well optimized SPI library code greatly impacts this test.  Numbers below are in kbytes/sec.  If you care about LAN-connected speeds, and your hardware is capable of higher SPI clock speeds, editing w5100.h can greatly increase this performance.

WebClient (google) is the WebClient example without any changes.  In this test, packets have approximately 7 ms latency.  This test measures how well the TCP communication works with Internet latency.  Numbers below are in kbytes/sec.  These numbers vary considerably.  The test was run 4 times on each board with the highest speed recorded.  YMMV!  If you care about Internet-connected speeds, editing Ethernet.h for fewer sockets and larger buffers can increase this performance.

UdpNtpClient tests UDP networking.  This example was run and 3 responses from the NTP time server was considered passing the test.

WebServer tests the EthernetServer functionality.  This example was run and a browser on a computer connected to the local network was used to access the analog readings info 3 times.

Board                   Shield                  WebClient       WebClient       UdpNtpClient    WebServer
                                                (local)         (google)

-- larger numbers = faster data transfer --

Arduino Uno R3          Arduino Ethernet R2     82.66           79.27           ok              ok
                        Arduino Ethernet R3     82.66           79.11           ok              ok
                        WIZ820io                331.27          191.85          ok              ok
                        Arduino.org Ethernet2   329.60          195.32          ok              ok
                        Seeed Ethernet W5500    329.00          185.44          ok              ok

Arduino Leonardo        Arduino Ethernet R2     82.28           78.75           ok              ok
                        WIZ820io                330.30          183.69          ok              ok
                        Seeed Ethernet W5500    328.14          179.98          ok              ok

Arduino Uno Wifi Rev2   Arduino Ethernet R2     72.30           69.55           ok              ok
                        Arduino Ethernet R3     72.23           69.50           ok              ok
                        WIZ820io                212.19          161.94          ok              ok
                        Arduino.org Ethernet2   212.88          169.72          ok              ok (linkstatus wrong)
                        Seeed Ethernet W5500    213.36          163.86          ok              ok (linkstatus wrong)

Arduino Mega 2560       Arduino Ethernet R2     77.44           74.31           ok              ok
                        WIZ820io                325.44          172.73          ok              ok
                        Seeed Ethernet W5500    323.36          179.58          ok              ok

Arduino Zero            Arduino Ethernet R2     96.64           91.42           ok              ok
                        Arduino Ethernet R3     96.64           91.33           ok              ok
                        WIZ820io                298.53          177.53          ok              ok
                        Arduino.org Ethernet2   305.28          181.60          ok              ok
                        Seeed Ethernet W5500    305.26          183.13          ok              ok

Arduino Due             Arduino Ethernet R3     109.73          105.98          ok              ok
                        WIZ820io                670.88          206.51          ok              ok
                        Seeed Ethernet W5500    689.69          214.44          ok              ok

Arduino 101 (Intel)     Arduino Ethernet R3     43.60           42.39           ok              ok
                        WIZ820io                349.35          169.37          ok              ok
                        Seeed Ethernet W5500    359.32          168.96          ok              ok

Arduino MKR1000         MRK ETH                 298.93          181.27          ok              ok
                        WIZ820io                291.98          125.20          ok              ok

Teensy 3.6              WIZ850io                1143.58         212.59          ok              ok
                        WIZ820io                1102.71         202.44          ok              ok
                        WIZ812MJ                274.14          180.76          ok              ok

Teensy 3.2              WIZ850io                958.06          205.37          ok              ok
                        WIZ820io                914.78          215.44          ok              ok
                        WIZ812MJ                234.55          170.07          ok              ok

Teensy LC               WIZ850io                479.73          200.51          ok              ok
                        WIZ820io                471.95          199.62          ok              ok
                        WIZ812MJ                137.77          126.40          ok              ok

Teensy 2.0              WIZ812MJ                84.85           81.07           ok              ok

ChipKit Uno32           Arduino Ethernet R2     272.18          159.72          ok              ok
                        WIZ820io                837.56          188.31          ok              ok
                        Seeed Ethernet W5500    858.81          177.19          ok              ok

Adafruit ESP8266        FeatherWing Ethernet    583.31          fail (dns)      fail (dns)      ok

Adafruit ESP32          FeatherWing Ethernet    965.76          211.06          ok              ok


Possible issues:
Adafruit ESP8266 fails WebClient (google) and UdpNtpClient tests, due to DNS
Arduino Uno R3 with WIZ820io running WebClient sometimes fails to connect to google
Arduino Due with WIZ820io running WebClient sometimes fails to connect to google
Arduino Uno Wifi Rev2 with WIZ820io running WebClient sometimes fails to connect to google
Arduino Mega 2560 with WIZ820io running WebClient sometimes fails to connect to google

Near-Term Plans

Not everything I wanted to accomplish made the 2.0.0 release.  These are changes I would like to make “soon”…

DNS on ESP8266 appears to be broken.  Help wanted!  Hopefully someone from the ESP community can look at this.  Or at least point me to a board that uploads faster and has a working Ethernet shield!  (nearly all ESP boards in Arduino form factor lack the 6 pin SPI header)

Non-blocking DHCP & DNS are needed for projects needing to keep rapid polling of other I/O.

DHCP could use improvements: set hostname, better handling of error conditions, disable when settings overridden by manual settings.

Farther Future Plans

In the distant future (and a dream world where I have many more hours in every day), I’d like to do much more with Ethernet.

Small writes could be combined and sent as single packets, if we had a timeout infrastructure or scheduler available.

DNS probably should migrate to Arduino core library, so it can shared among different networking libraries.

DNS cache should be implemented, at least with 1 entry, so we don’t repetitively look up the same host’s IP number.

Wiznet chips have an interrupt pin, which is currently unused.   On high-end boards, we could allocated buffers in RAM and read data earlier, to allow faster TCP speeds over high latency networks.

Someday I’d love to integrate EventResponder

But here & now, this 2.0.0 brings a much-needed features and a huge improvement in performance to all Arduino users!

DIY Audio Sampler

HomeMadeGarbage put together a DIY audio sampler.

This sampler project was put together using the Teensy audio library and the audio library design tool.   For this project six short sounds are played from memory.

You can see a short clip of the sampler in action here

#teensy audio board でサンプラー自作 #slipknot

A post shared by Home Made Garbage (@homemadegarbage) on

Code for the project can be found on this Hackster.io page.


Soft MIDI Pedals

Daren Schwenke is making his own MIDI pedals by fabricating his own custom pressure sensors measured by varying capacitance!

Daren’s old MIDI pedals were wearing out, so he decided to make new ones to replace them.  He made is own foot sensor by making a capacitor out of 2 pieces of foil with mylar between them.

Current code for the project is available on GitHub.

LED Top Hat

Chris Faye made an awesome LED top hat.

The hat uses an 8×32 LED matrix in 4 sections that run in parallel using the FastLED library.  While battery life does depend on the brightness of the LEDS, Chris did wear the hat and had it running for about 5 – 6 hours at the Edwardian Ball without needing to change the batteries.

There is some good discussion on this forum thread about trouble shooting some issues where the LEDs were dramatically slowing down after about a minute.

Code for the project has been published on GitHub.

Euroshield by 1010Music

The folks at 1010Music have released the Euroshield, a Eurorack and audio interface for Teensy.

Euroshield allows users to customize their own synthesizer module.  It uses the standard Eurorack power systems as well as standard patch cords for input and output of standard Eurorack level audio, CV and MIDI signals.

A few of the features include:

  • Two audio inputs and outputs using the Eurorack -5V to +5V standard
  • DC coupling allows audio ins and outs to be used as control voltage connections
  • MIDI input and output via 3.5mm TRS minijacks
  • Board design allows mounting in Eurorack while exposing the Teensy
  • Built-in controls enable users to create a fully functioning product:
    • Two knobs
    • One push button
    • 4LEDs
  • 10 demo Sketches include sample code for filtering, reverb, and VCO.

SparkFun AVC Rover

Jesse Brockmann built an autonomous rover for the SparkFun AVC where’s he’s competed for the last 4 years, winning in 2016 and 2017.

Jesse started working on his first rover in 2011 and finished it in 2014 to compete in the SparkFun Autonomous Vehicle Competition.  He offers some great advise for people helping to build their own.  He says the most important parts are the brains, his uses a Teensy 3.5, the Inertial Measurement Unit (IMU), and the RPM sensor.  Another important consideration is the base platform.  Jesse uses a 4×4 platform with a low center of gravity.

You can get more information on builing your own rover an the DIYRovers Google Group Forum.


Making a Twin Engine RC Airplane Safe (TwinAir Project)

Zaite12, an RC Airplane enthusiast, added a flight system (TwinAir project) to a custom made RC air plane make it safer to fly in the case of engine failures.

Zaite12 and a friend have been flying RC model airplanes for a number of years and have watched many twin engine aircraft tragically crash – mostly due to one engine failing.  A plane can be landed safely after an engine fails, but it is no trivial task.


The pair had been talking about building a twin engine airplane and this got Zaite12 thinking about how to more reliably deal with the inevitable loss of an engine.  Humans are not reliable enough for this task, but a computer is.  He got to work on a system to manage a long list of tasks.  While the Teensy 3.1 he started with quickly ran out of inputs and outputs, a Teensy 3.6 had what he needed to make the project happen.

The key features included in the system are:

– PWM edges from the 8 output channels of the RC receiver have to be accurately timed
– Output/control of all servos
– Engine RPM
– Airspeed
– Ground logic through the use of a proximity sensor (possibly in future we will use squat switches)
– RPM synchro using a PID loop to make the aircraft “sing” and not “wah wah wah”
– Telemetry downlink and voice annunciations on the FrSky X9D Taranis Plus transmitter we use (e.g. “Right engine fail”)
– Execution flow is critical and must not block for any significant time, under any circumstances, even if a sensor fails or physically disconnects
– Fallback assumptions in the event that one or more sensors fail (e.g. ground proximity)
– Datalogging of all important data for subsequent analysis

Soon the initial design goals were complete and they pair could deliberately cut an engine in flight, the rudder was managed automatically by the new flight system, and the aircraft could still be flown.

Here is an example of the telemetry data displayed on the receiver

In this video their custom RC aircraft experiences a genuine engine failure and they are able to keep it flying.

Code for the project can be found in this forum post.

Ultimate Gumball Machine

Arduino “having11” Guy took a gumball machine and stepped it up a notch by adding LEDs, WiFi, and an LCD Screen – just to name a few improvements

This ultimate gumball machine features an interactive TFT display that allows users to dispense gumballs and change the LED colors.   A Teensy 3.5 provides the processing power needed to drive the display.

Code for the project can be found on the Hackster.IO project page

Files for the 3D printed parts can be found over on Thingiverse